

How To Draw Deer In Easy Steps
At that place are few moments yous can have in nature that are as wonderful as encountering a pretty deer in the woods.
These gentle animals are always a welcome sight, and they have come to stand for the calmness and peace of nature.
Deer play an important role in many cultures worldwide as well, and they are a favorite beast of many people.
People honey to describe and pigment these lovely animals besides, and if y'all've wanted to larn how to draw a deer yourself, and then read on!
This stride-by-stride guide on how to describe a deer in viii steps will make drawing a deer easier than you could have ever idea!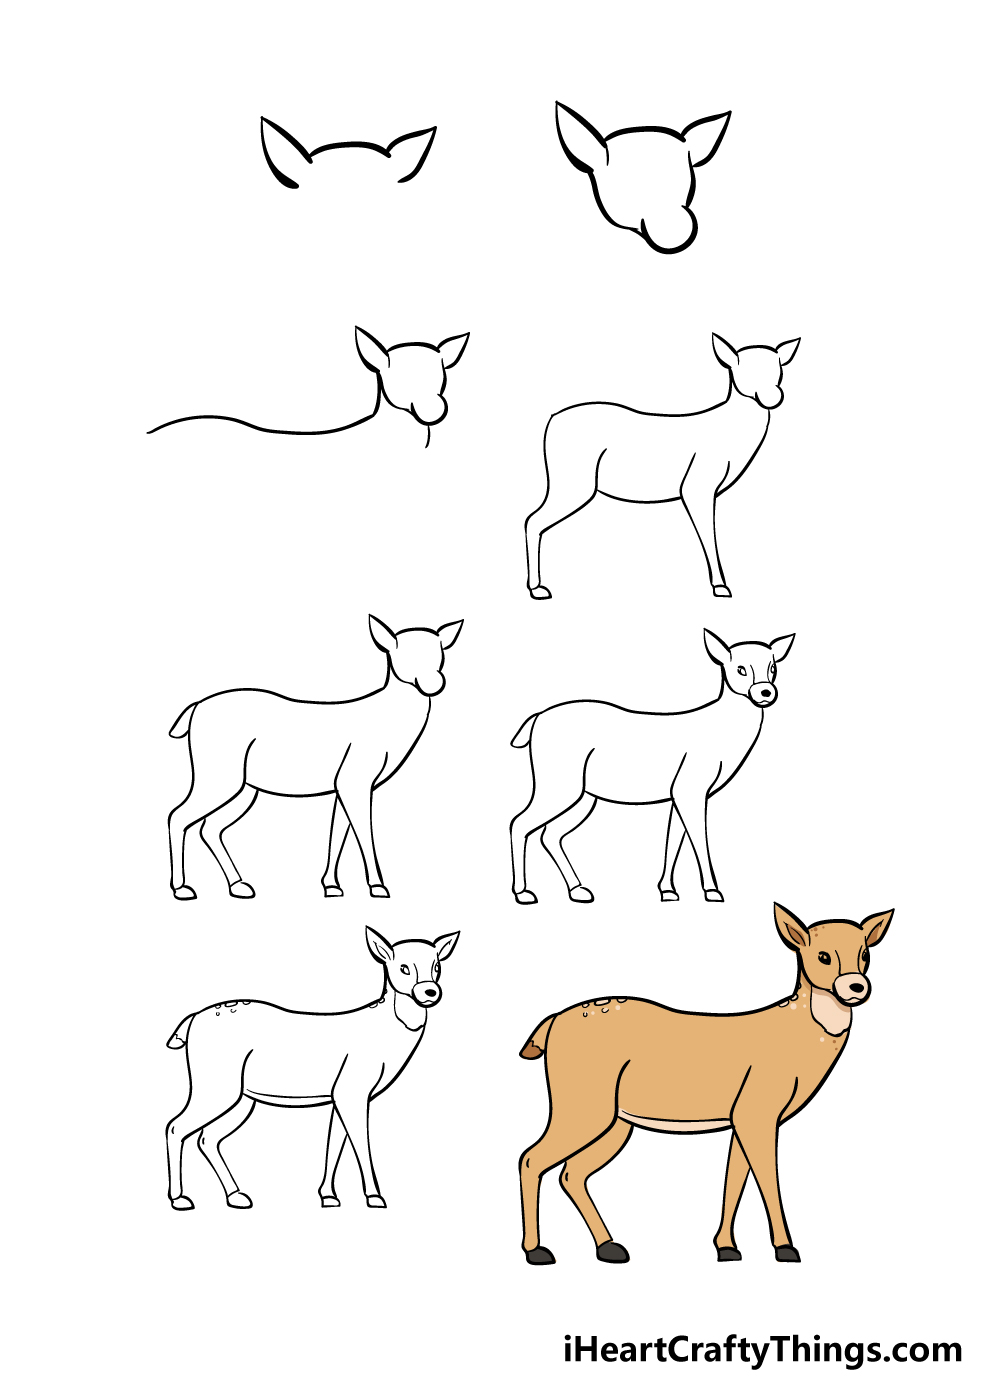
What's in this Blog Mail
- How to Draw A Deer – Let's go Started!
- Step one
- Step 2 – Next, draw in more than of the head
- Step iii – Now, get-go to draw in the body
- Step 4 – Add some more parts to the deer'south body
- Step 5 – At present, draw in the other legs and tail
- Footstep half dozen – Next, draw in a face for your deer
- Step 7 – Allow's add some final details to your deer
- Stride 8 – Now stop off your deer with some color
- Your Deer Drawing is Complete!
How to Draw A Deer – Permit'southward get Started!
Pace 1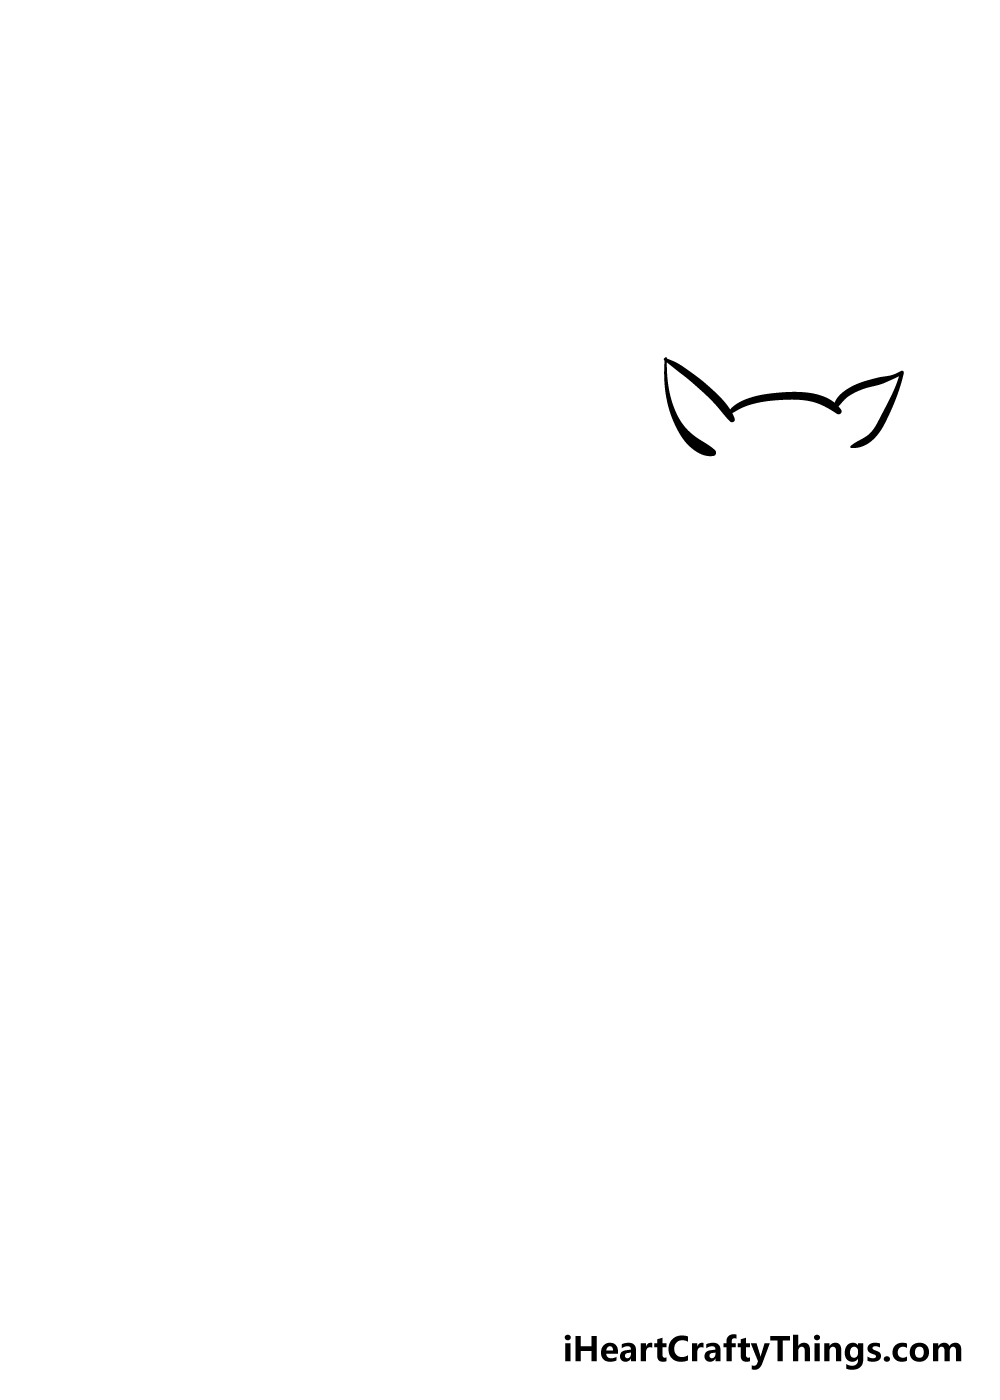
Sometimes in life, y'all have to start from the top instead of the bottom, and that's true of our first step in this guide on how to depict a deer!
Deer have cute, pointy ears, and we shall offset with them for this step. To depict these in, yous can just employ some curved lines with a bespeak in them every bit they announced in the reference image.
Using a rounded line between them will grade the top of the caput.
Pace 2 – Adjacent, describe in more of the head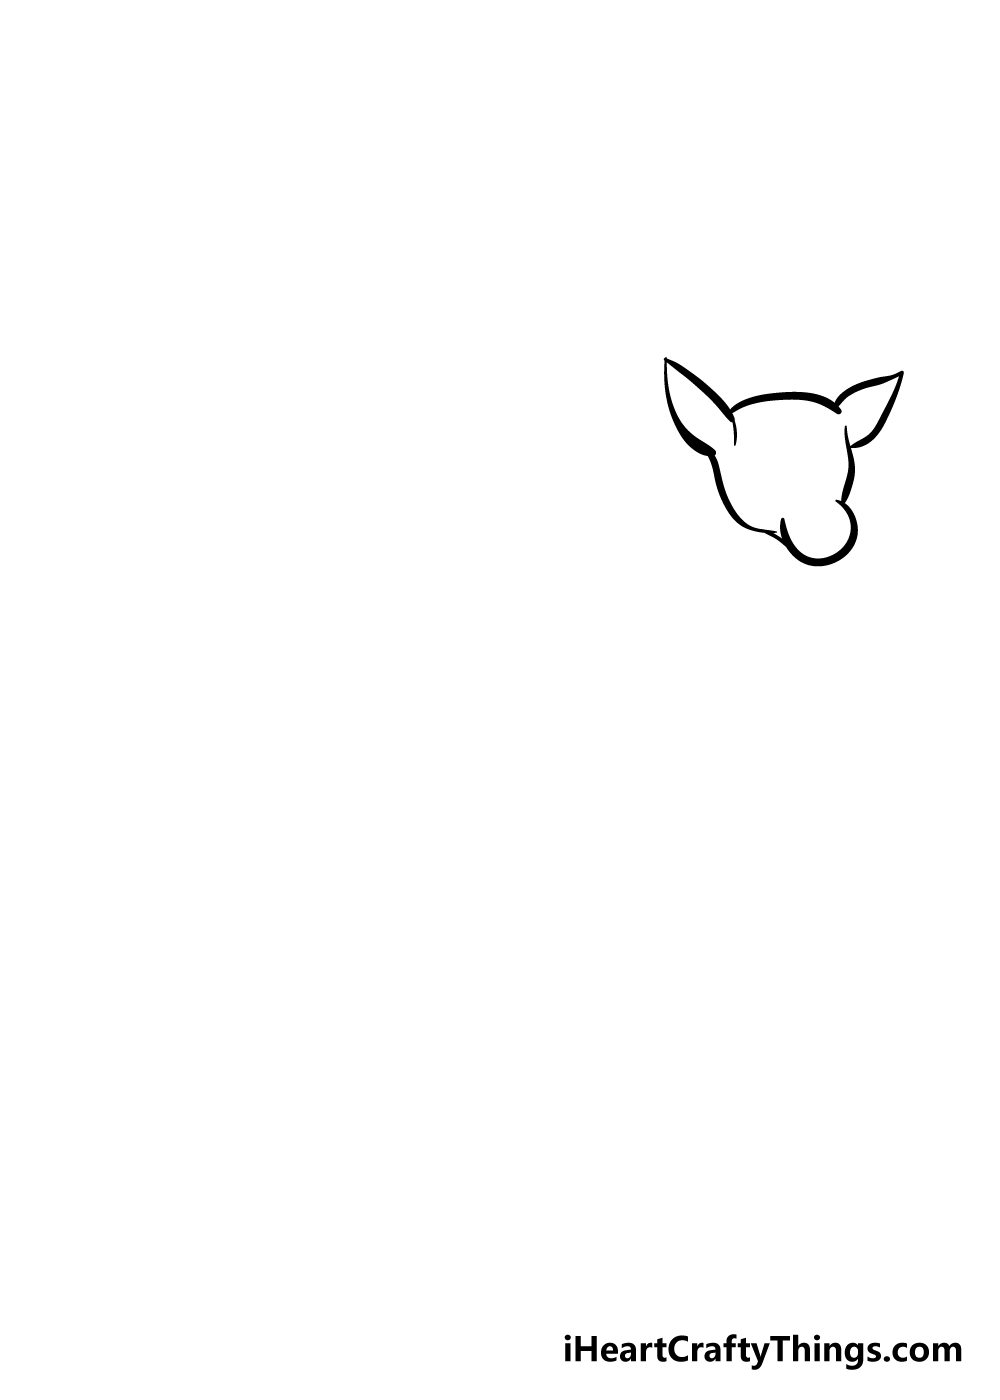
For this stride of your deer drawing, we shall be adding in the residuum of the head outline underneath the ears. Carefully describe in some more angular shapes to class the primary outline of the head.
And then, at the forepart of the face up, you can draw in a more than rounded shape as you can come across in the reference prototype. We will exist adding the muzzle of the deer into that more rounded area shortly.
Footstep 3 – Now, starting time to draw in the trunk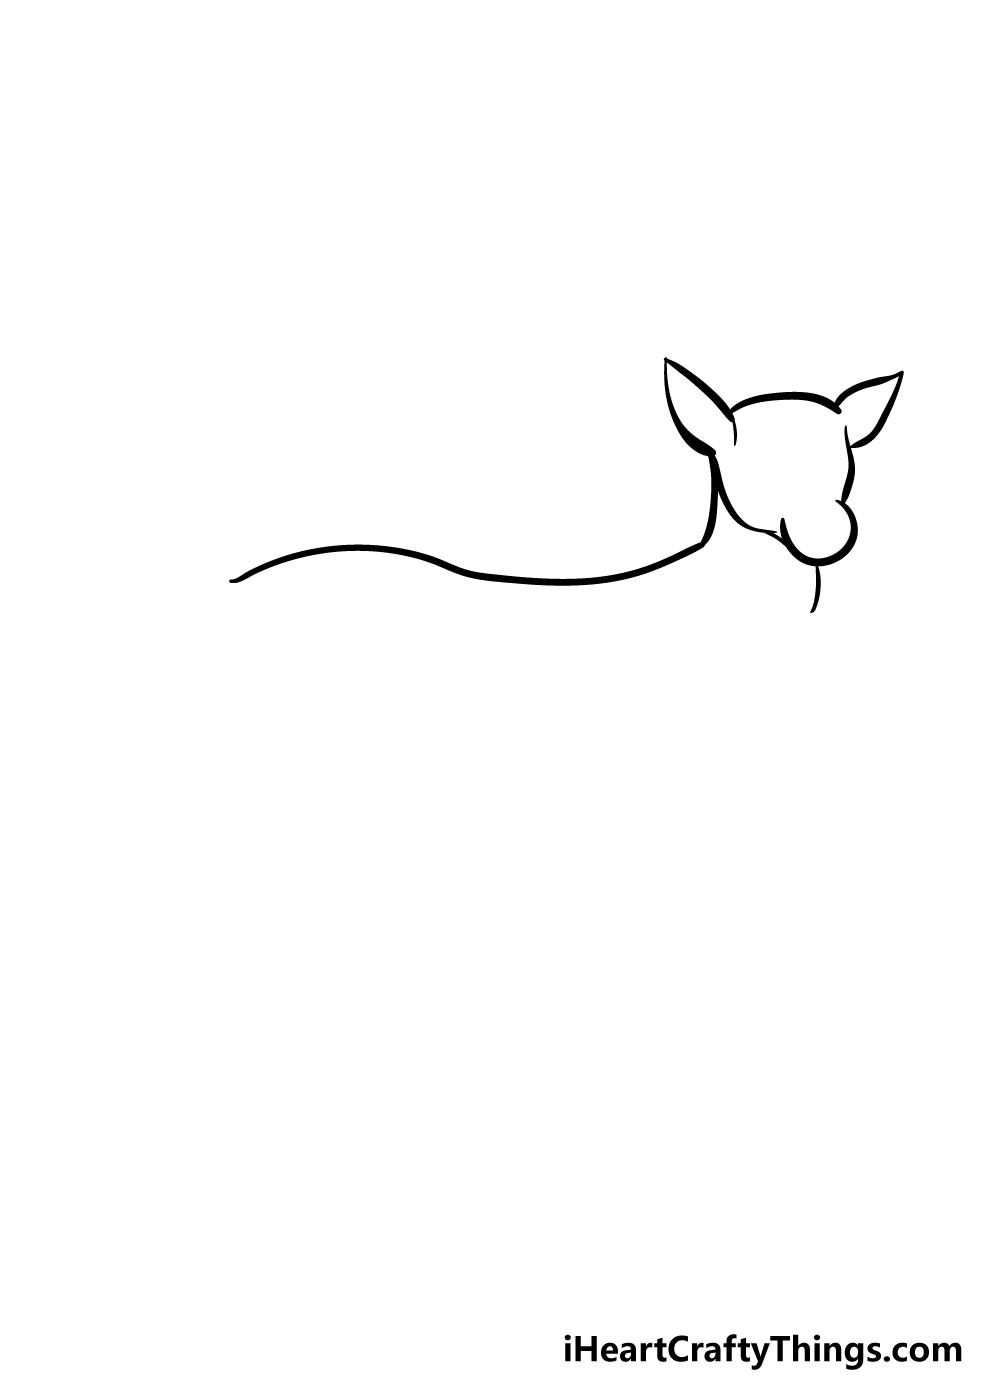
The head outline is complete, so for this third stride, we shall start to draw in the back of the deer.
This will be a curved line extending down from under the ear and forming a curved line back from the caput.
In one case you lot take the back line looking like information technology does in the picture show, add ane more curved line under the front of the face to brainstorm the breast of your deer drawing.
Step iv – Add together some more than parts to the deer'due south torso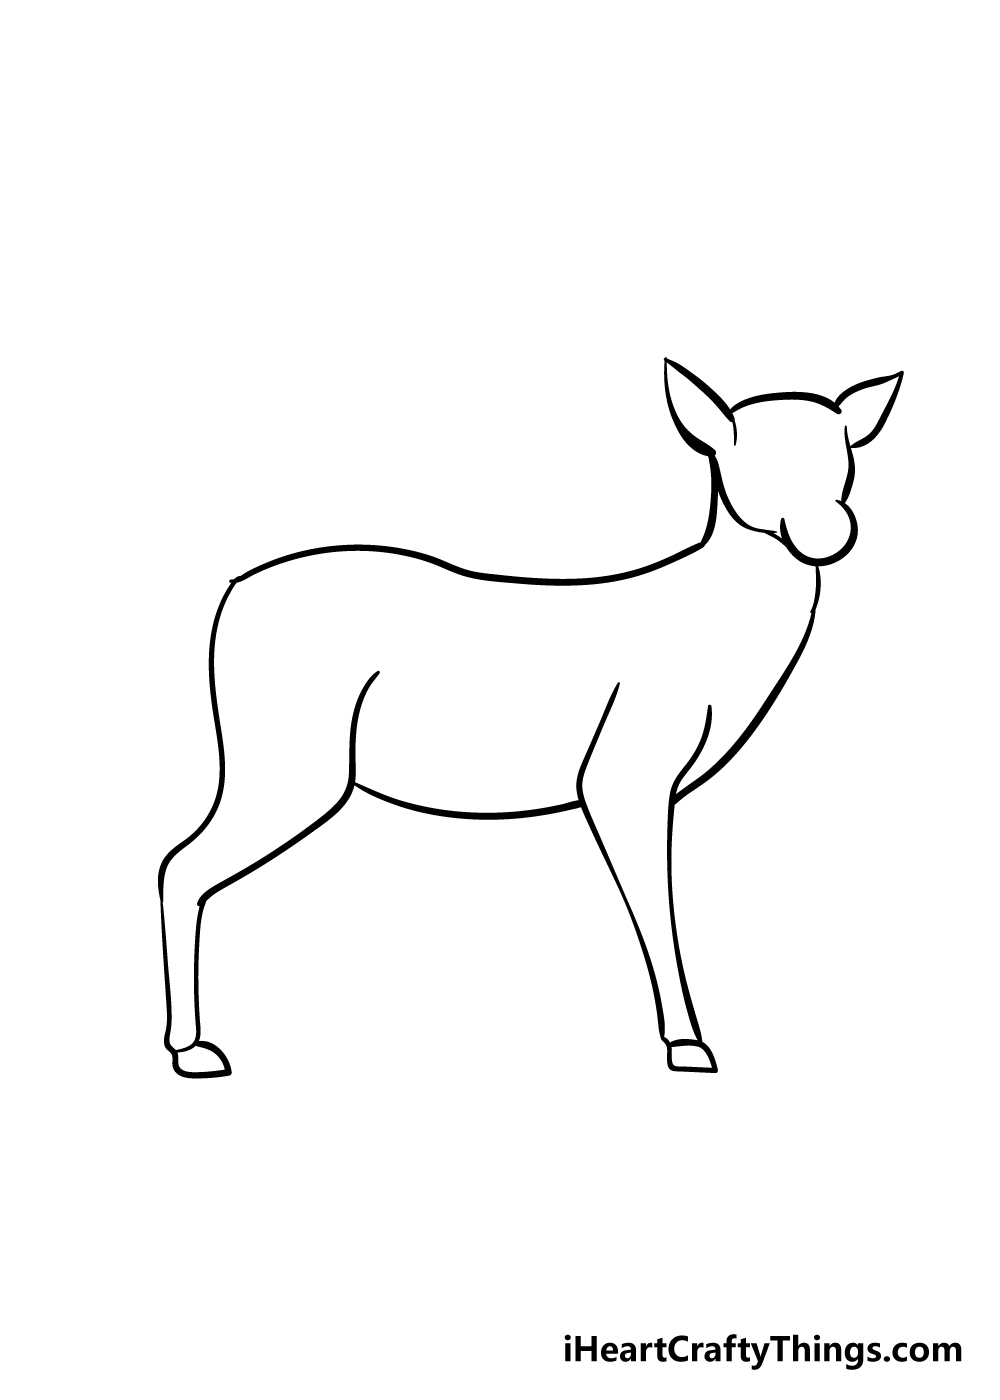
We're starting to build up your deer cartoon nicely at present! For this pace, we shall exist calculation more to the torso of the deer.
Using the lines yous drew for the dorsum and the breast of the deer, you lot can outset to depict in the legs.
The legs are thicker at the top and then get more than athwart as you lot go down. The reference paradigm will assistance you lot a lot with getting the shape right!
Once you take these legs drawn, simply add together a curved line between them to make a belly for your deer, and and so extend the chest line downward as well.
Step 5 – At present, draw in the other legs and tail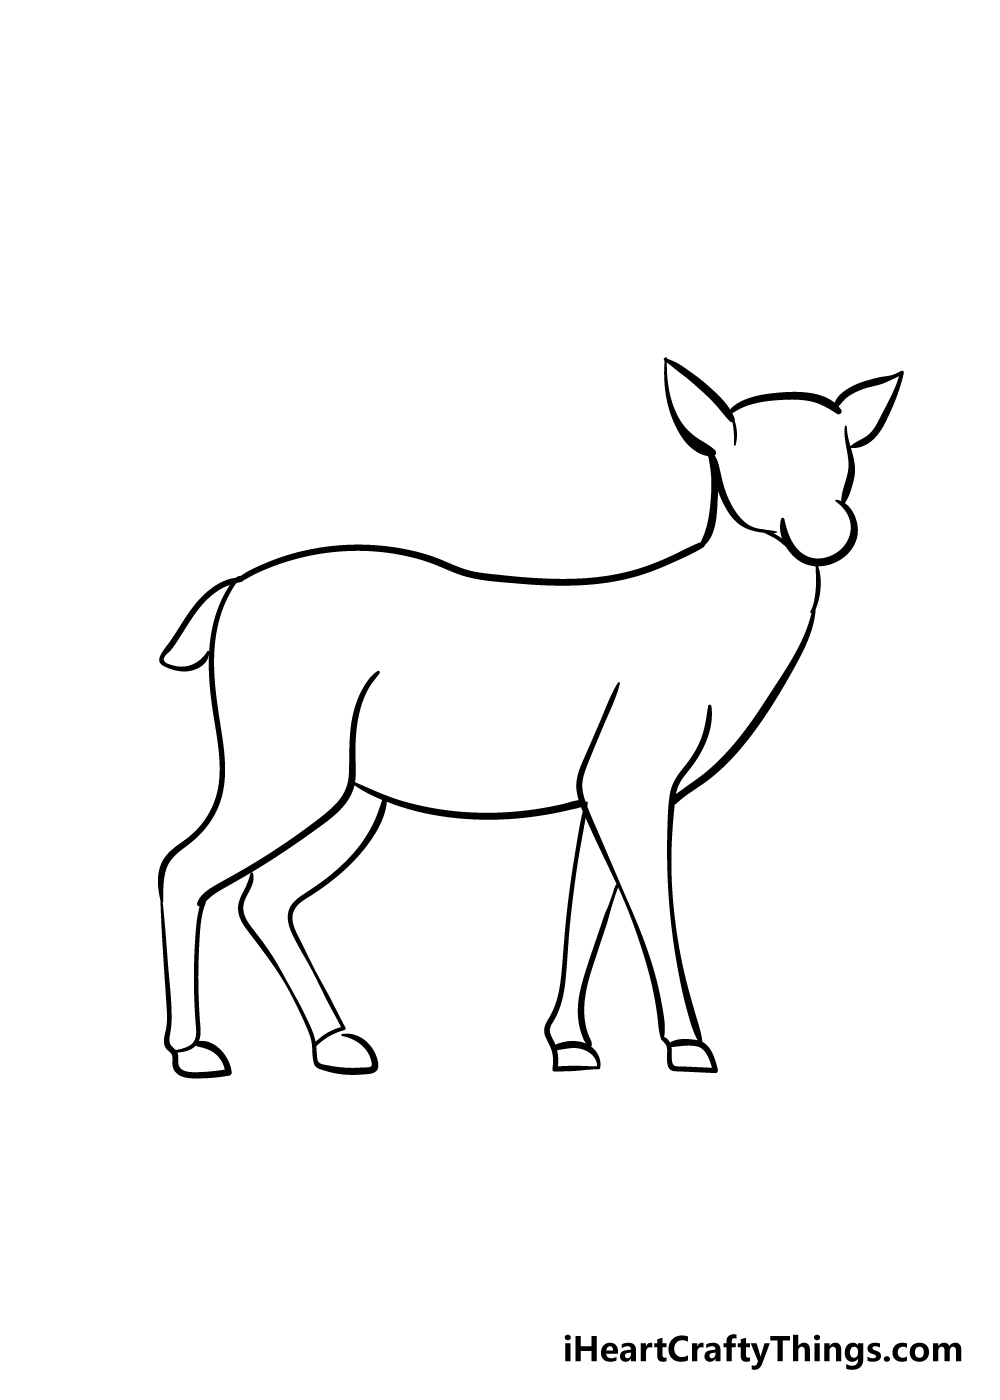
You've already drawn in two legs, so adding in the other ones should be easier in this step! But draw in two more legs that look like the ones y'all drew previously, just on the other side of the trunk.
Then, use a curved line to create a modest tail for your deer drawing.
Step 6 – Side by side, describe in a face for your deer
The outline for your deer drawing is pretty much complete now! In this step of our guide on how to draw a deer, we will piece of work on a face for the deer.
The eyes for the deer are quite small, and they sit down on the sides of the face. You tin can then draw in the oral cavity portion with a curved line under a solid, black nose.
The nose and oral cavity will exist in the rounded expanse of the face up that you left before.
Lastly, draw in a line over the olfactory organ to make a snout for your deer, then have two thin lines between the eyes to create some bone structure for the face.
Pace 7 – Allow's add some final details to your deer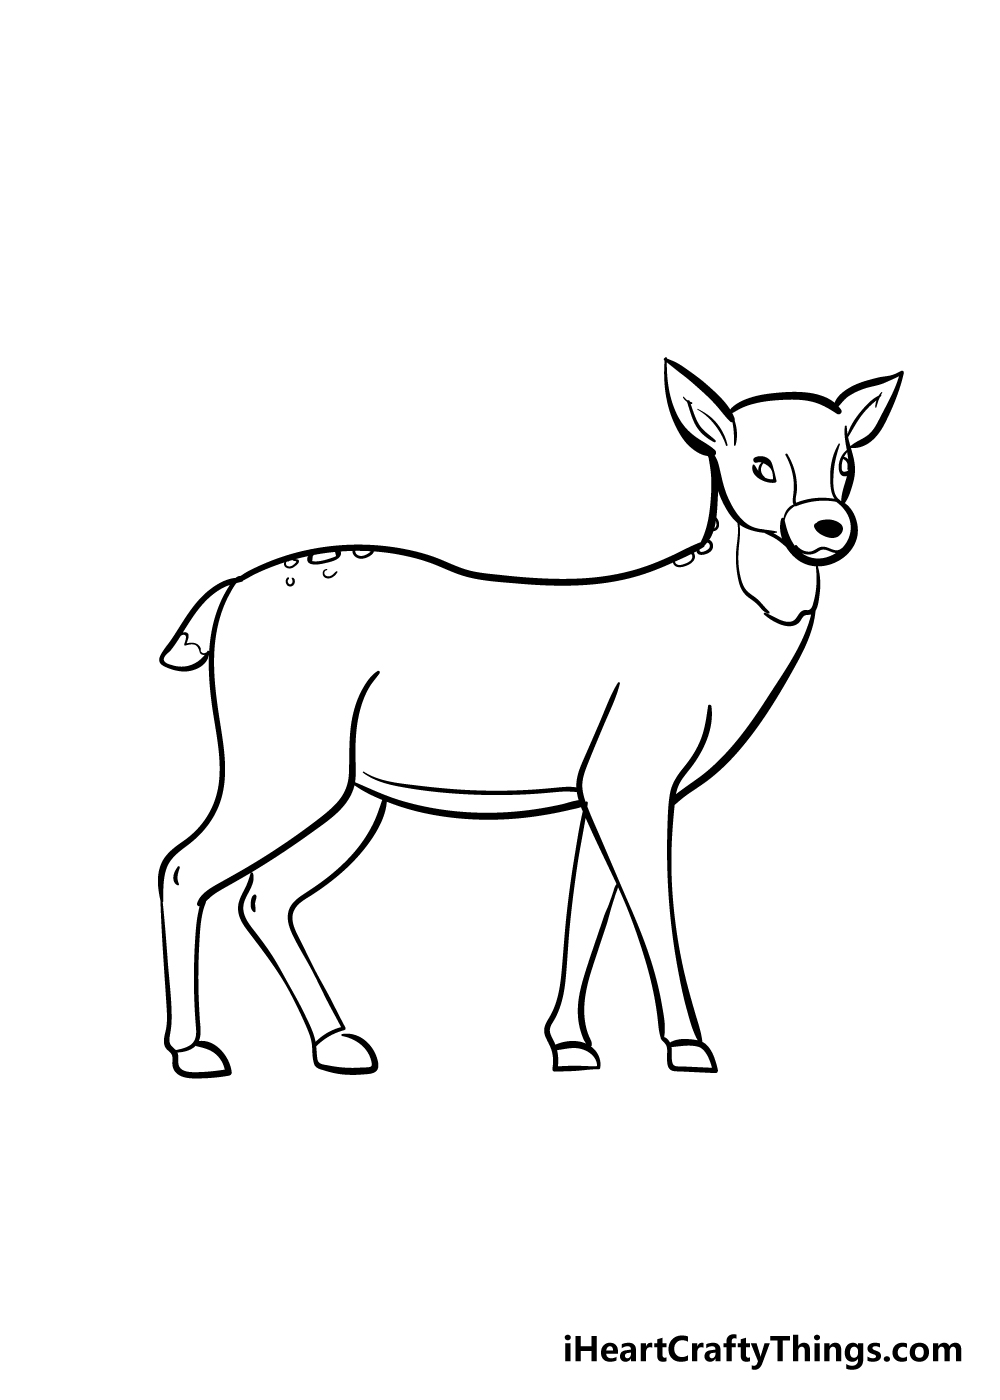
With the face up drawn, your deer drawing is just a few details away from beingness set up for some color!
We have added s few details with some lines to the inner ears, abdomen, tail and legs to create some pattern variation.
There is too a line underneath the head for you to color later on, and lastly you lot can add together some spots to your deer as well.
These are the details we would add, but what else do you lot think you'll add to it?
Pace 8 – Now finish off your deer with some color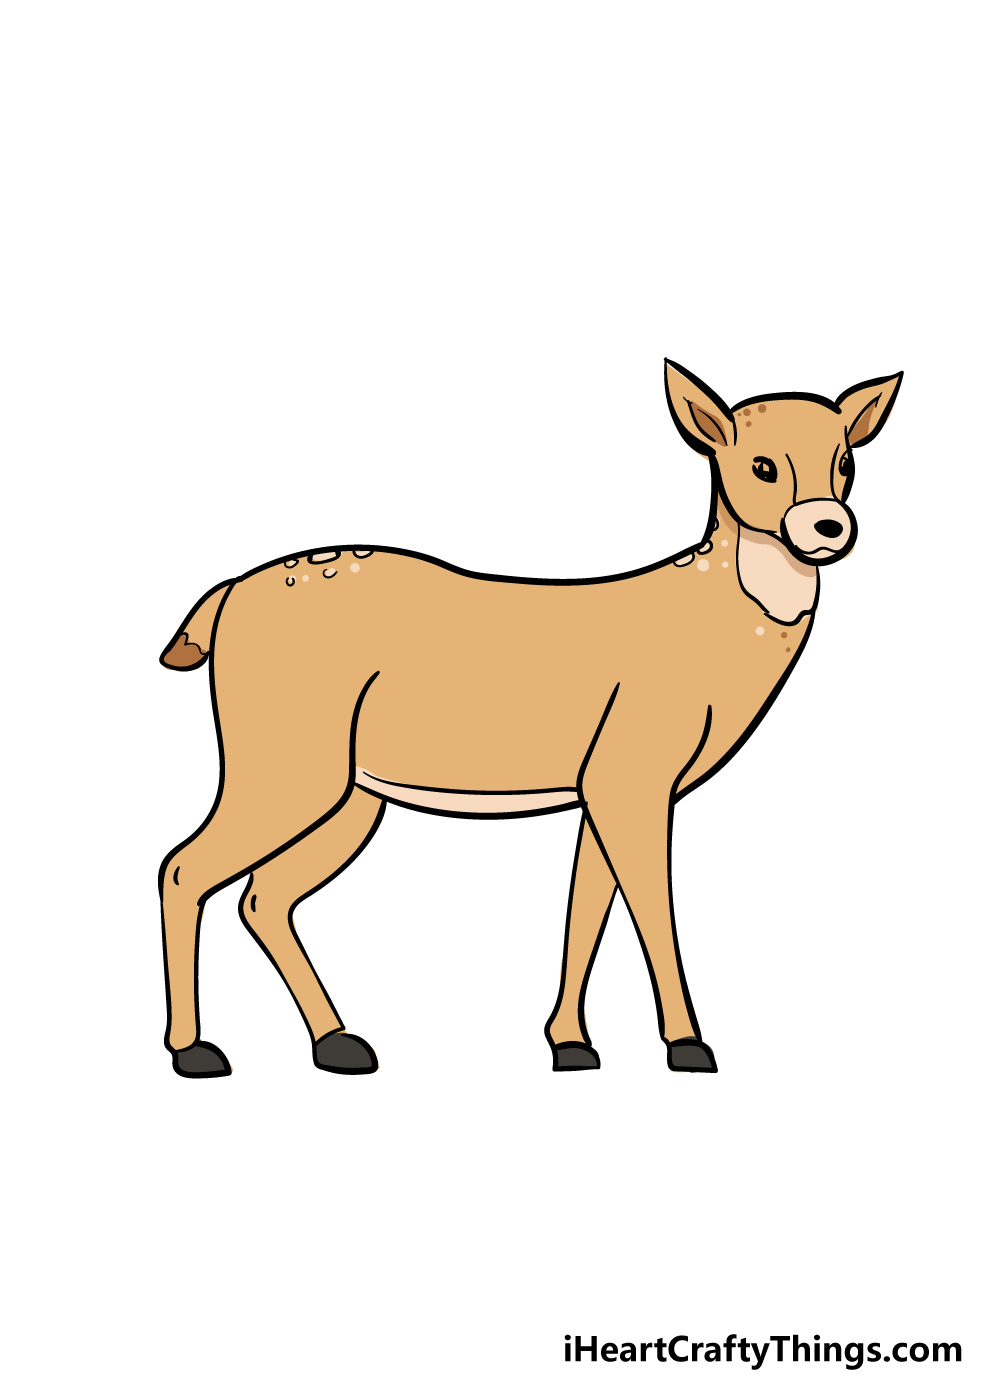
That brings us to the final step of our how to describe a deer guide!
Now that you've successfully drawn a cute deer, all that remains is to color it in. the reference image we provided here shows you just one out of many means that you can color in this deer.
You lot could get with more muted, chocolate-brown colors to go along it looking a scrap more realistic, merely you lot can also go artistic with some fun and unique colors!
Once you choose the colors you lot would like, you can so have some fun with some bully fine art mediums! If I were coloring in this image, I would use some watercolor paints for a more muted await.
I would also describe in and colour a overnice forest groundwork for this deer, but what mediums do you recall you will employ? Will you draw in a groundwork? We can't wait to see how you end it off!
Your Deer Drawing is Complete!
You set out to larn how to describe a deer, and you succeeded! This brings us to the finish of this guide, and we hope you lot had a groovy fourth dimension with it.
We designed this guide to be informative only also to be a lot of fun! Cartoon is always made much easier when breaking it downward into a few steps, and we know you can exercise it if y'all follow the steps and try your all-time.
At present you can decide on some awesome actress details! Whether it'south with some astonishing and vibrant colors, a unique groundwork or some lovely paints, we can't wait to see how yous put your own spin on information technology.
Please exist sure to cheque out our site frequently, as there will exist many more footstep-by-step drawing guides similar this 1 coming out often for you to savour!
We would as well love to see your deer drawing in one case it's drawn and colored, so we hope you volition share it on our Facebook and Pinterest pages for u.s.a. to adore and appreciate!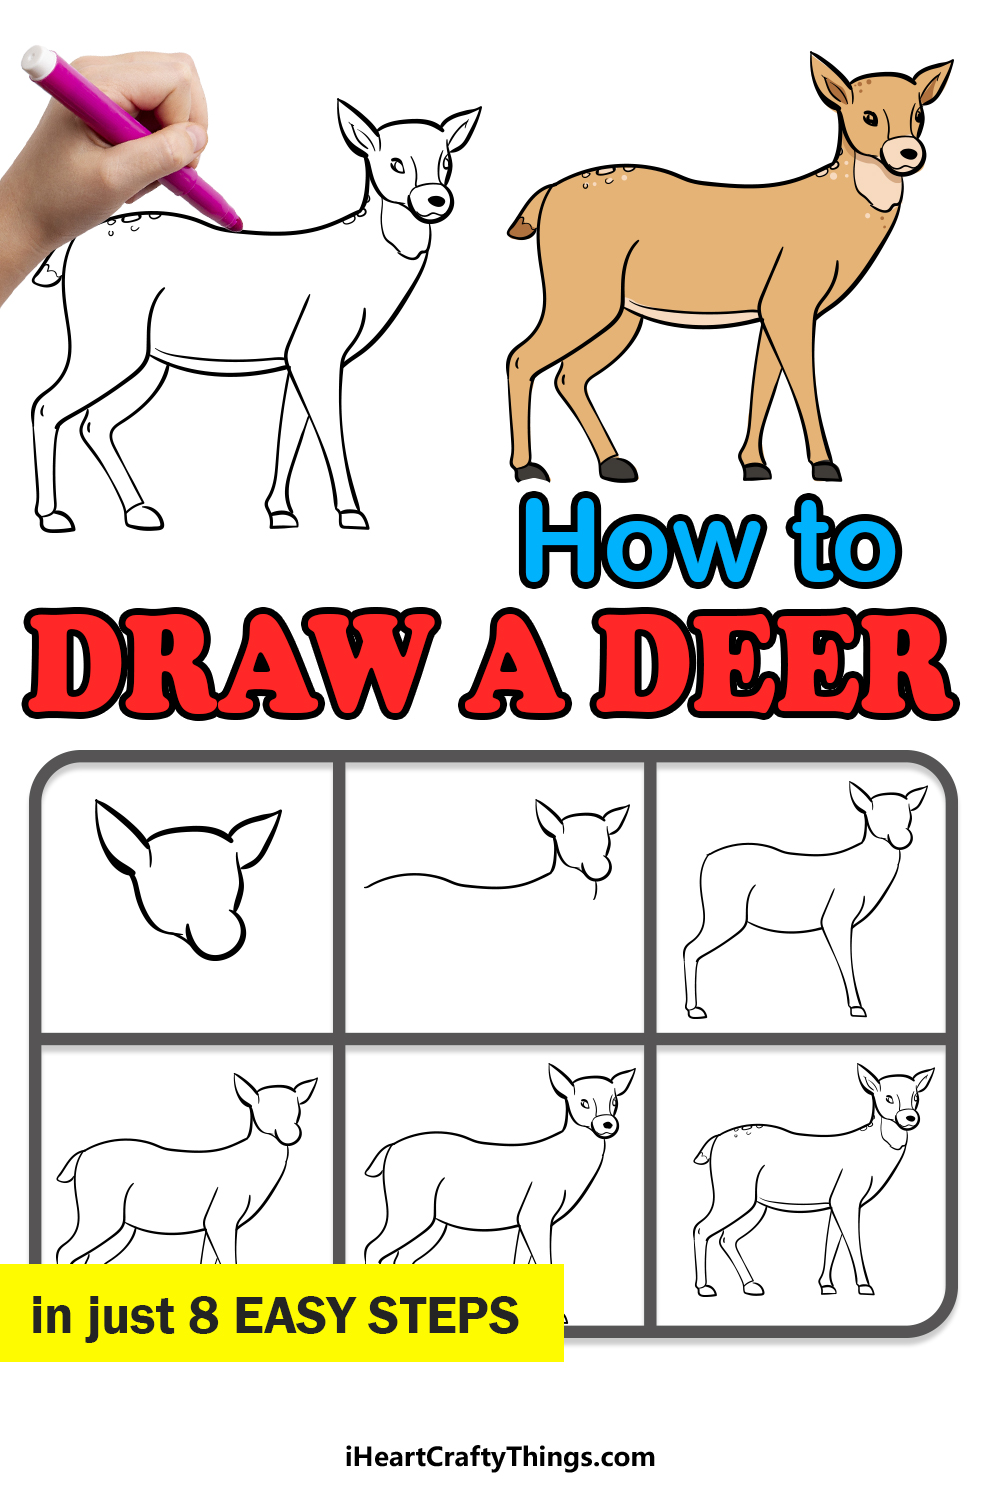

Source: https://iheartcraftythings.com/deer-drawing.html
Posted by: listergioncy.blogspot.com
0 Response to "How To Draw Deer In Easy Steps"
Post a Comment