

How To Create Own Database
SQL
An Easy Way to Get Started with Databases on Your Own Computer
An introduction on how to use SQLite browser and manage your own database.
SQL is the third most popular language for developers, based on the StackOverflow 2020 Developer Survey. Everyone knows that you should learn to use SQL, but what about actually creating and managing a database?
While you can follow courses that let you play with SQL on a browser with predefined tables (which is not a bad way to learn), it's also valuable to experience creating, managing, and interacting with a database of your own.
The DB Browser for SQLite ( DB4S) is a tool that makes relational databases accessible to anyone. It allows you to interact with an SQLite database, the entirety of which is contained in a single file. No servers or extensive configuration are needed to get it running. Both DB4S and SQLite are free!
If you don't have any experience working with databases or SQL, this is a tool that will help you get up to speed with the fundamentals. The DB4S has a spreadsheet-like interface similar to Excel, which means that you can create and edit tables in your own database without using SQL. You also have the option to write custom SQL queries and view the results.
Using the DB4S is a great way to get your hands dirty creating and working with relational databases. This piece will get you started with using the tool. The walkthrough is broken down into 7 parts:
- Installation and setup on your own machine
- Creating a database file
- Importing and exporting tables with CSV files
- Adding, modifying and deleting rows (records) and columns
- Searching and filtering records
- Running SQL queries
- Visualizing data with graphs or SQL queries
1. Installation and setup on your own machine
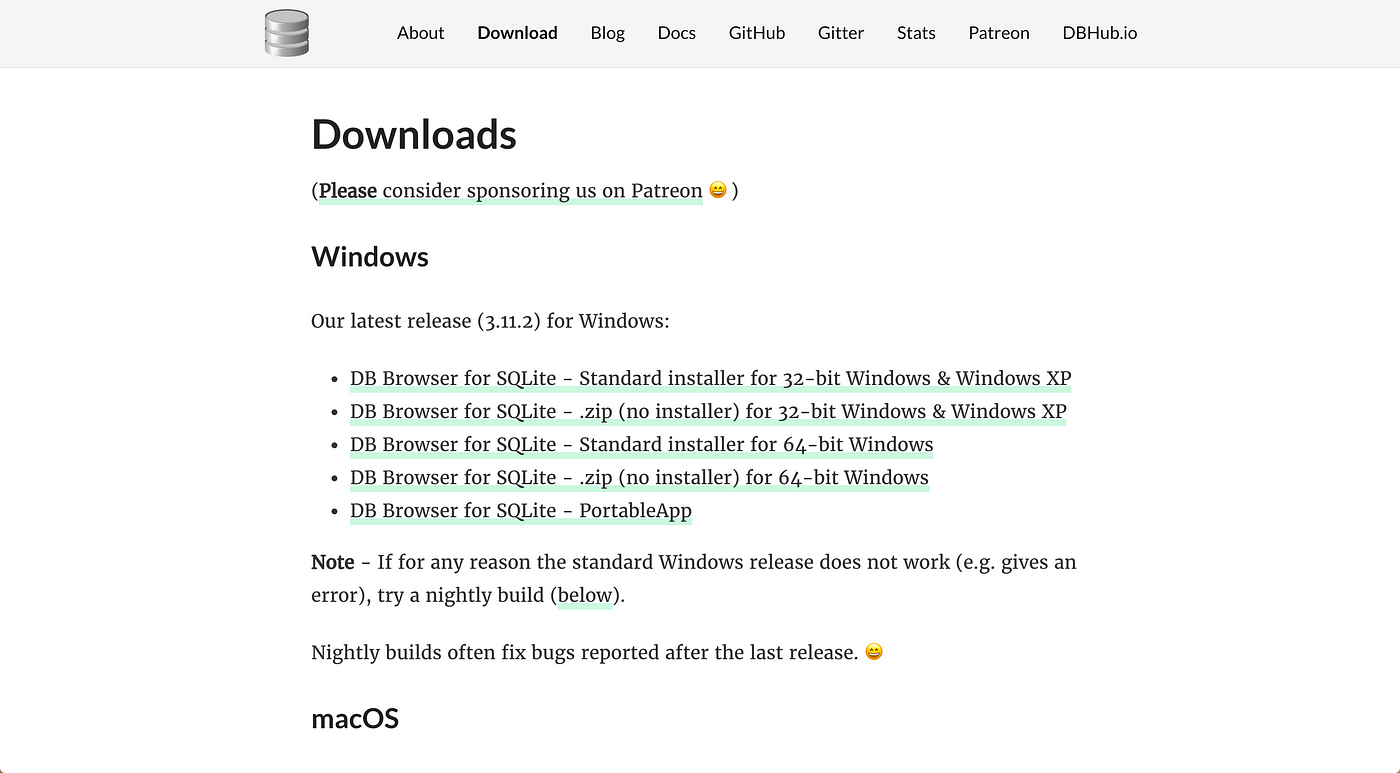
You can check out the installation details on the DB4S website here. You can download the latest versions for both Windows and macOS. It's also available for Linux based distributions.
If you have Homebrew on macOS, you can also install the latest release with this line:
brew cask install db-browser-for-sqlite Once you've gotten DB4S installed on your machine, open the application and you're ready to begin!
2. Creating a database file
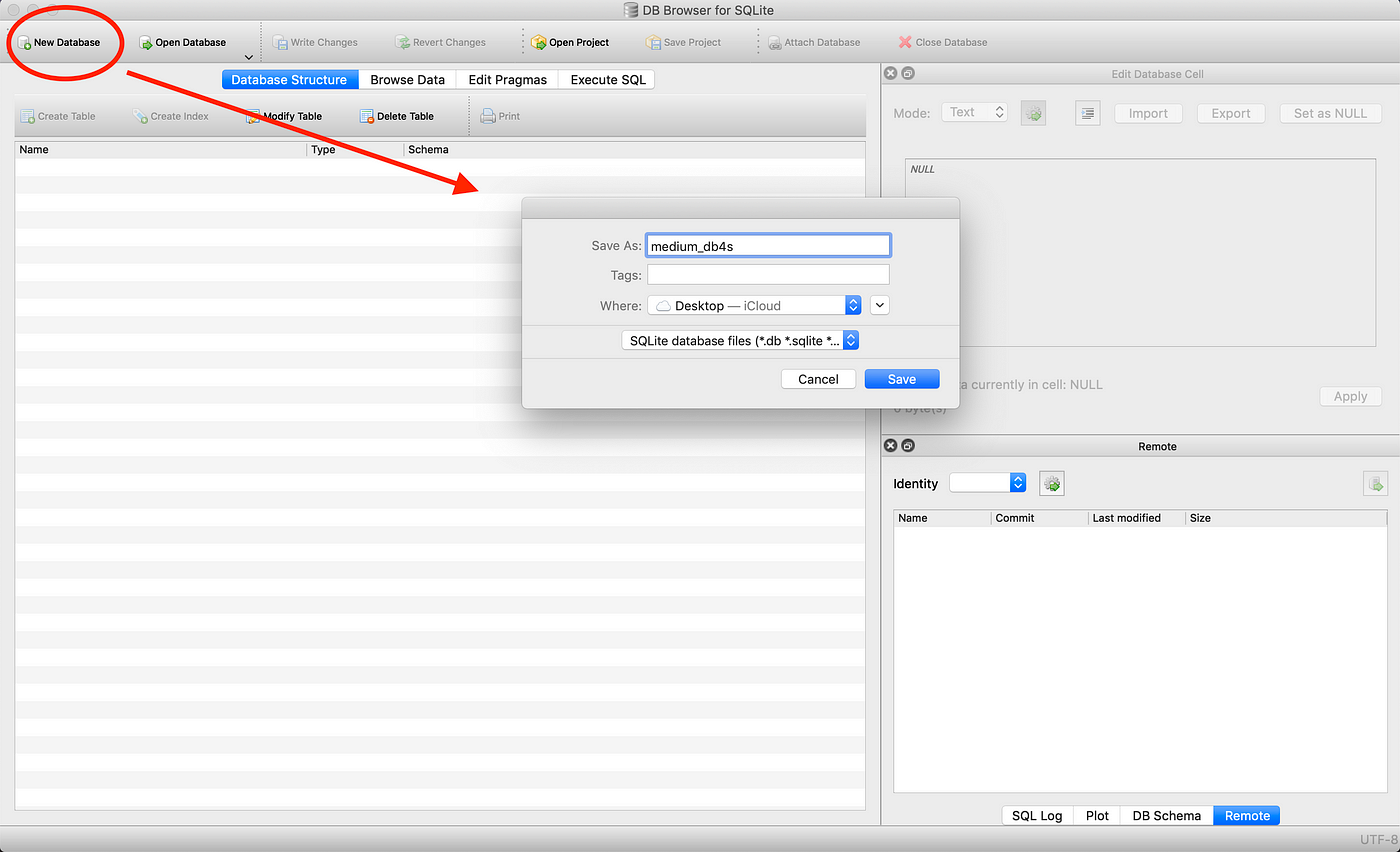
When you open DB4S, on the top left you see a button labeled "New Database". Click on it, type out a name for your database, and hit "Save" to your desired folder.
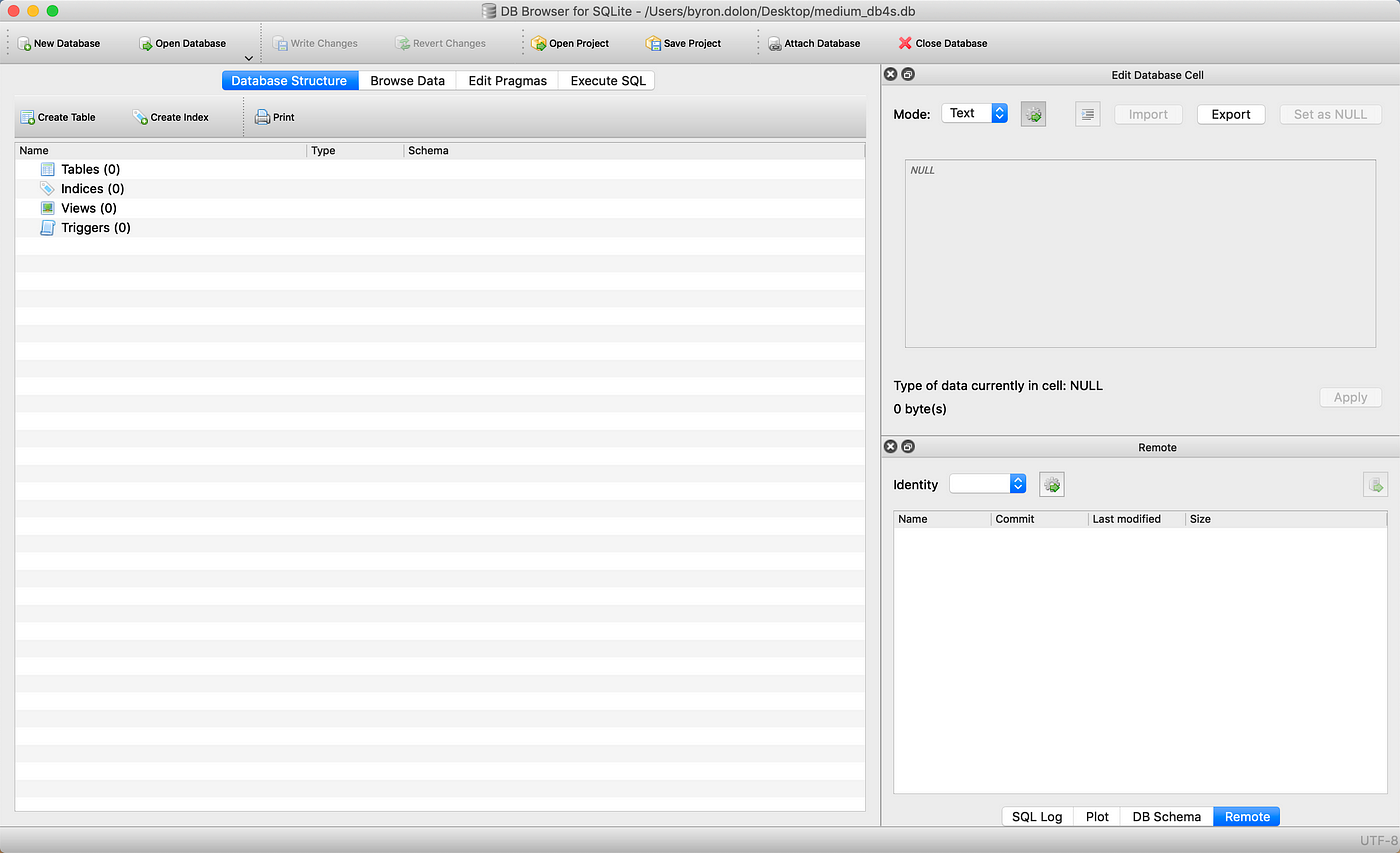
That's it! You've created your first SQL database. You should now see this:
3. Importing and exporting tables with CSV files
Now let's create our first table. To do so, we're going to import a CSV file with metadata for pieces featured on Medium's popular page. I got the data in an earlier Python project that you can check out here.
The CSV looks like this:

To create a table with this file, on DB4S, you do:
File > Import > Table from CSV file... 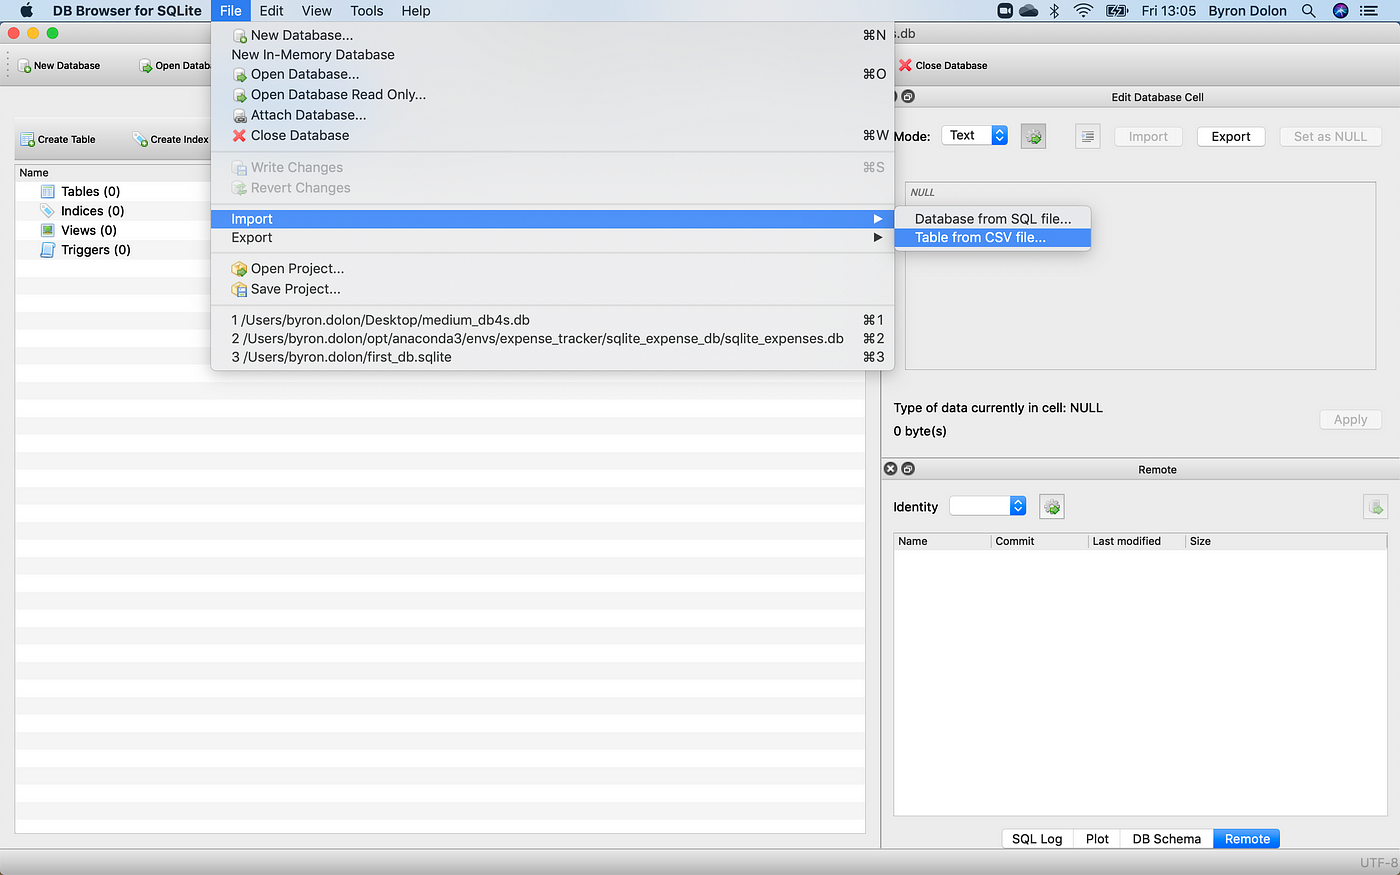
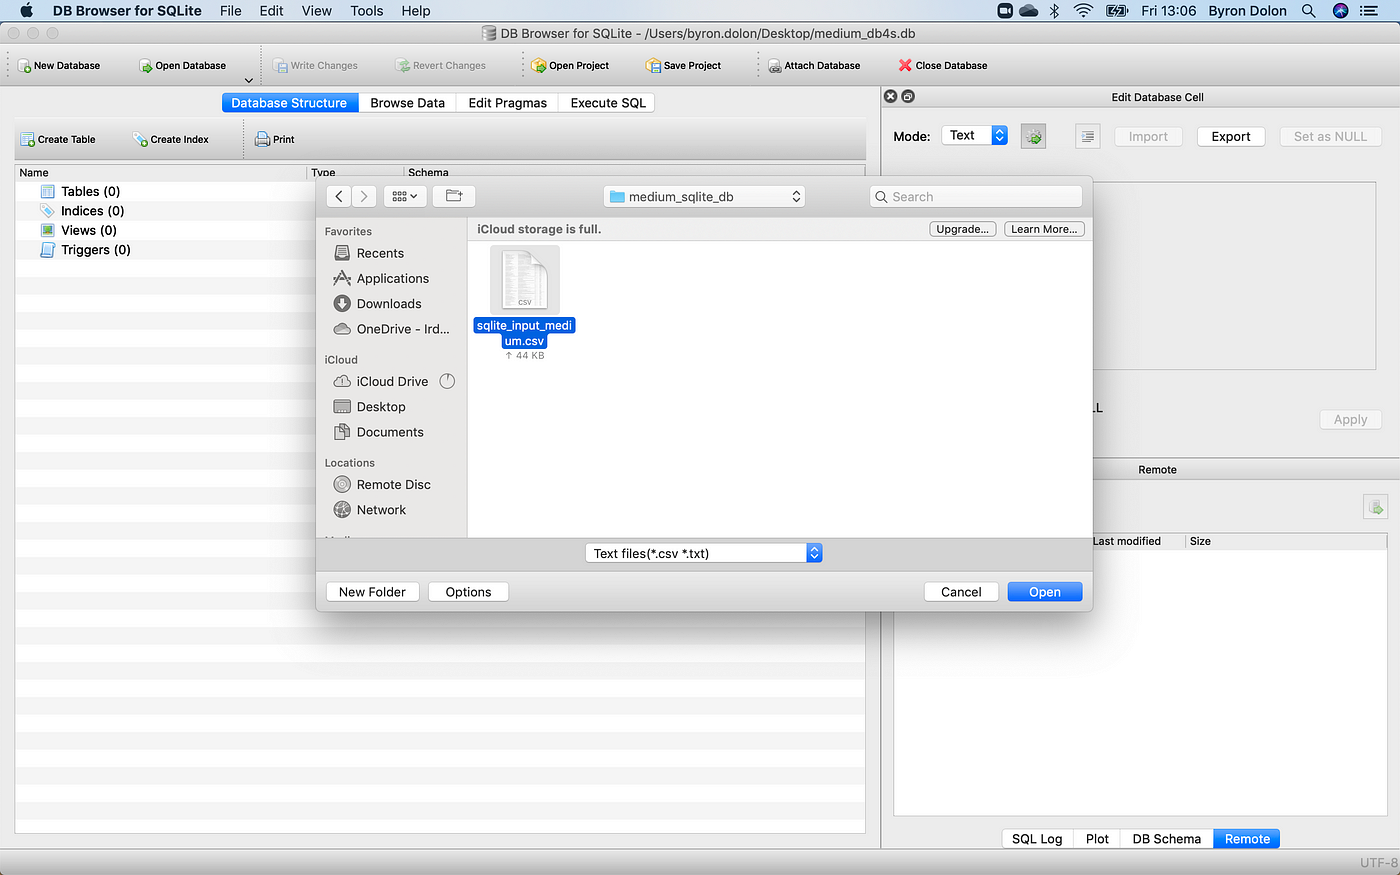
After that, select your desired CSV file and hit "Open".
This will prompt another window for a couple of customization options. Change the name to something that's easy to remember. If the column headers are already in the first line of your CSV file, tick the box to make sure DB4S recognizes that. It will shift the first row to become the column names. Then hit "Ok".
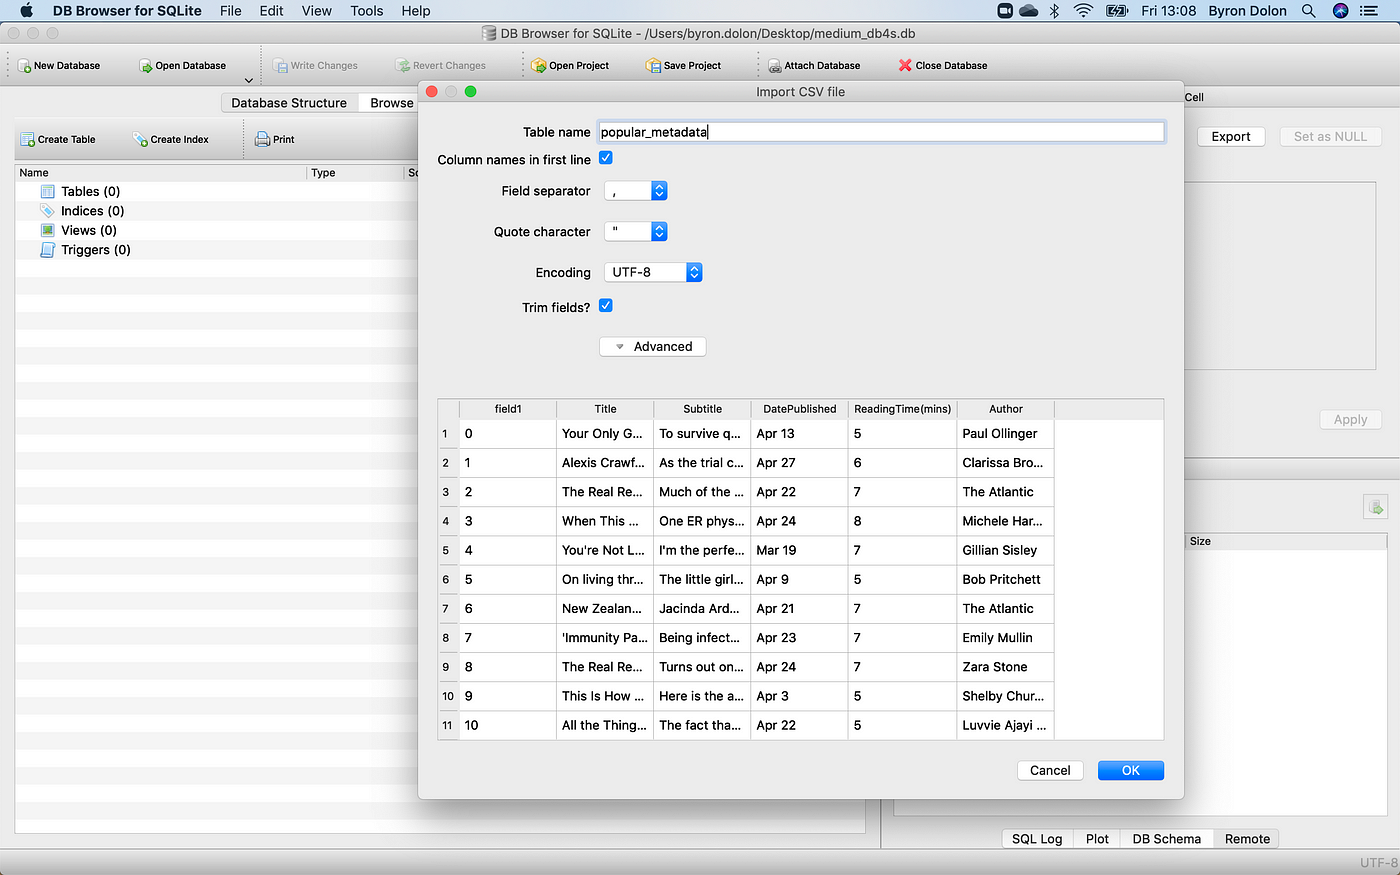
And boom! You've created your first table.
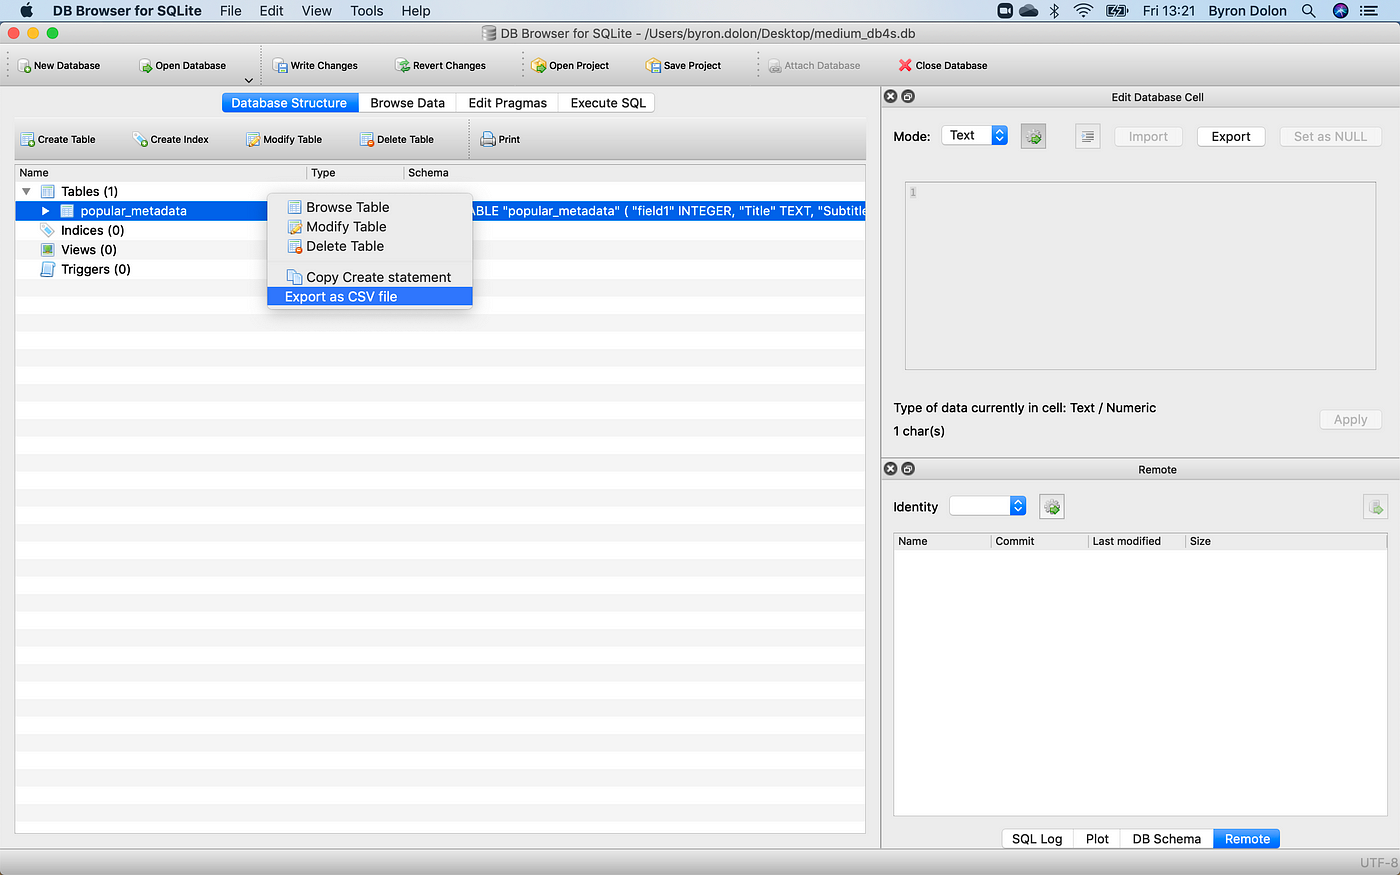
Exporting the database file to CSV is just as easy. All you have to do is right-click on the table and click "Export as CSV file".
Or to bulk export more than one table, do this:
File > Export > Table(s) as CSV file... 4. Adding, modifying and deleting rows (records) and columns
Now let's take a look at our table on DB4S. Right-click the table and select "Browse Table".
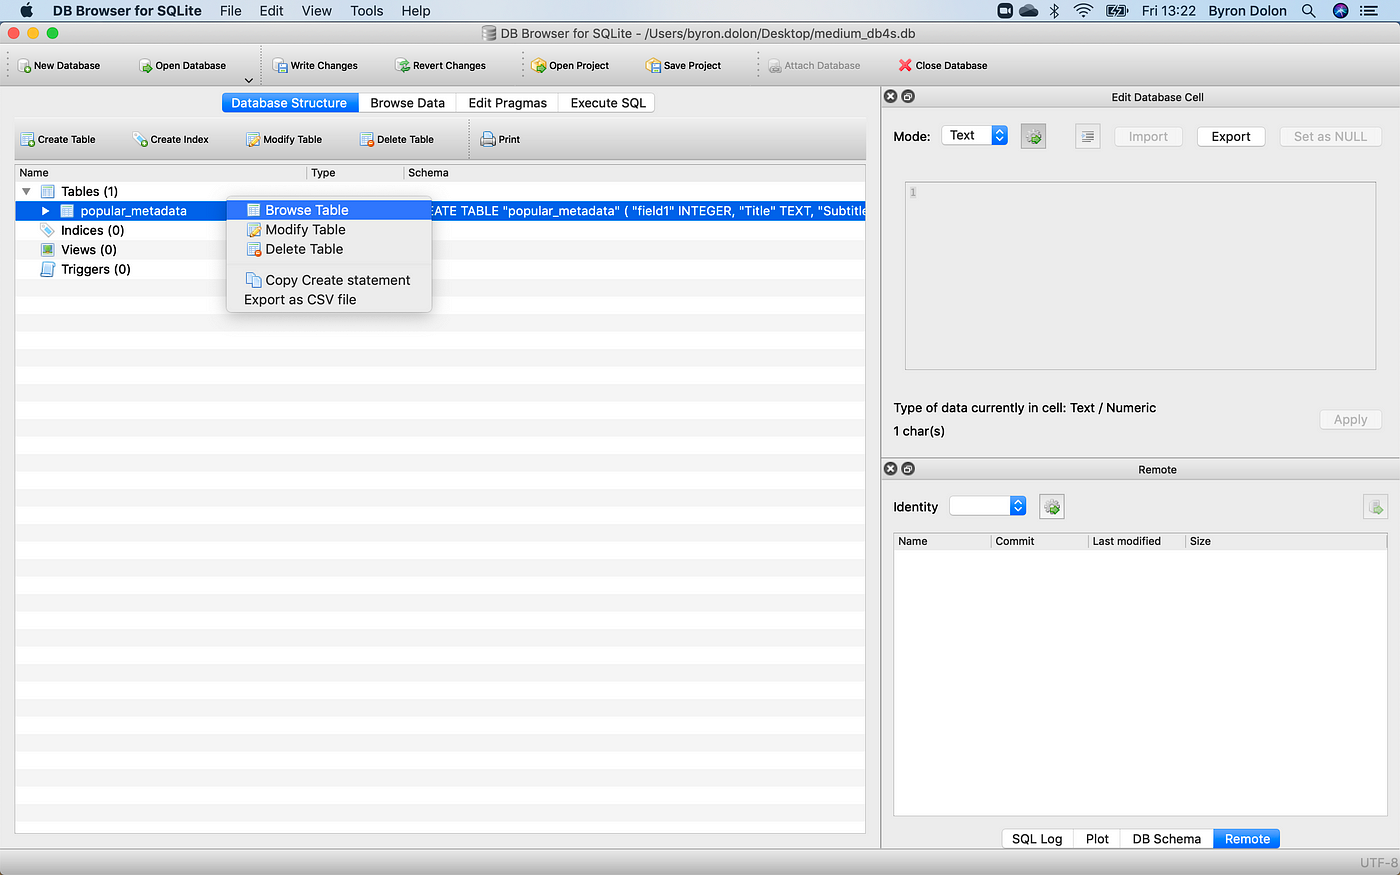
You will now see the table in a classic spreadsheet-like format.
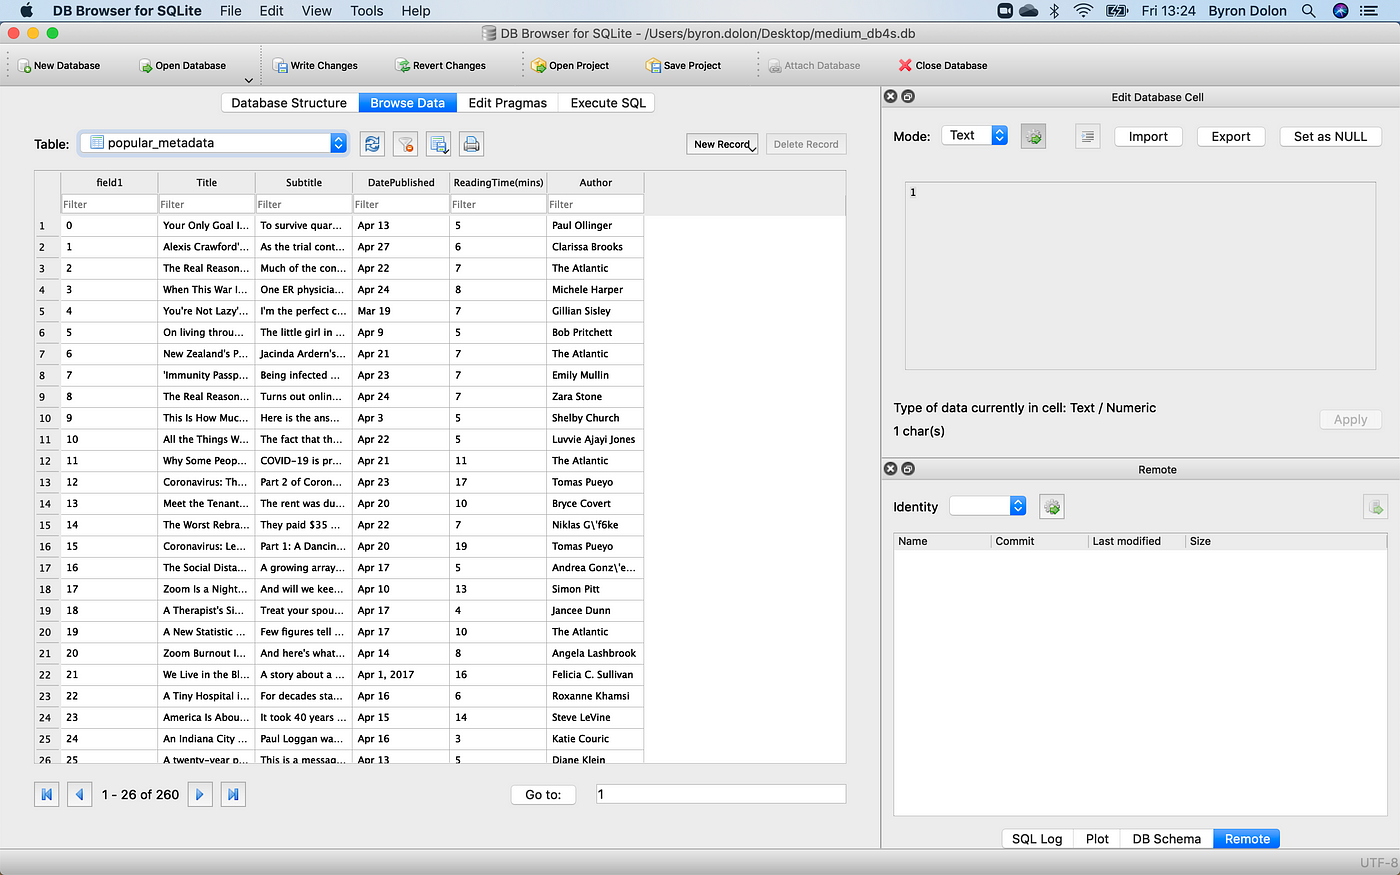
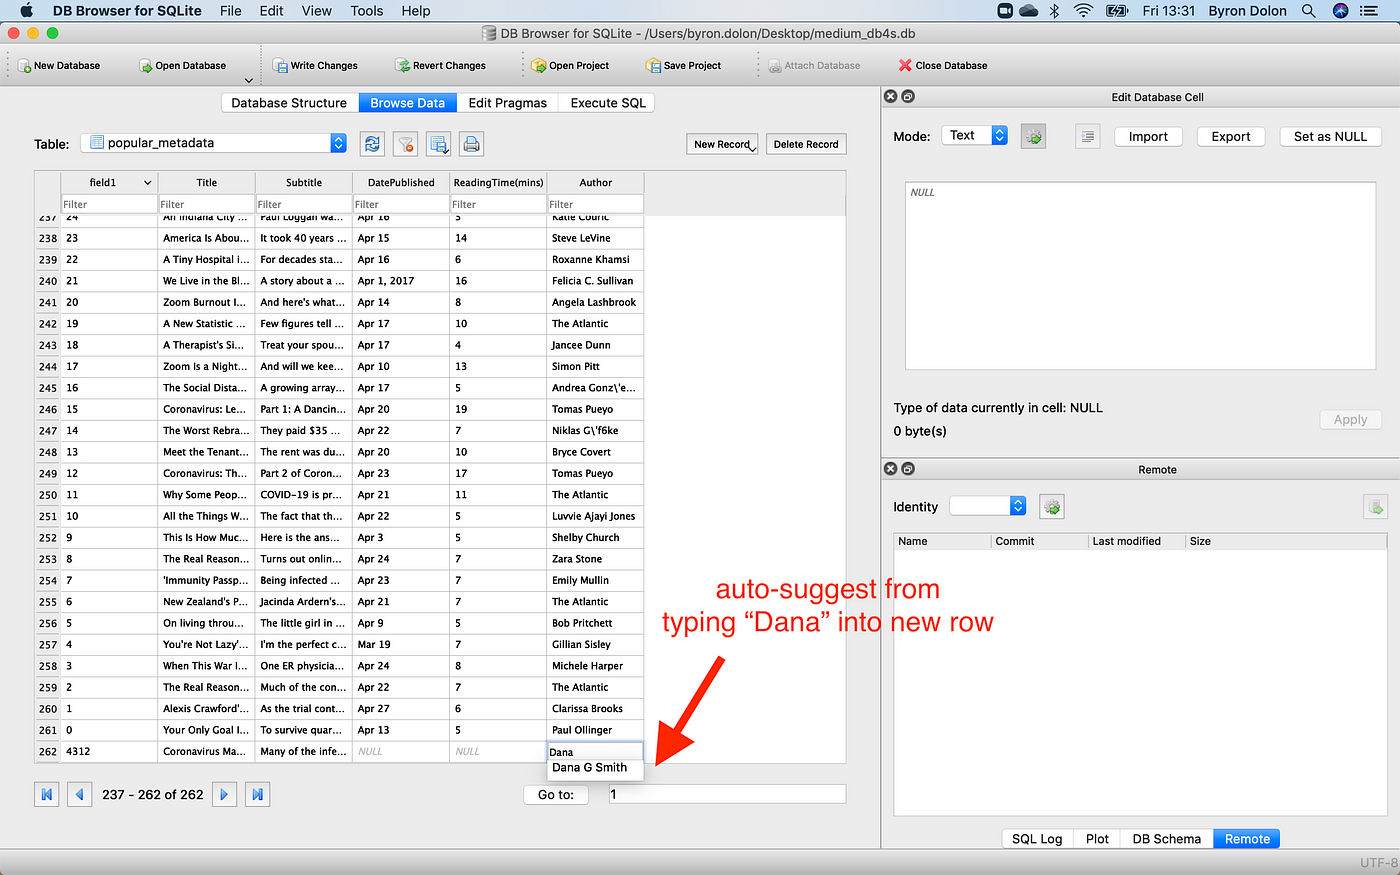
If you want to add a new row, just click "New Record", and DB4S will create a new row (already with a primary key) for you to fill in with values, just like you would on Excel. In this case, we may want to do so every time a new piece is added to Medium's popular page. DB4S will even suggest a row value based on the first letters you type in if the value already exists in the database.
To delete a row, you just need to select a row (click on a primary key on the leftmost column) and then click "Delete Record".
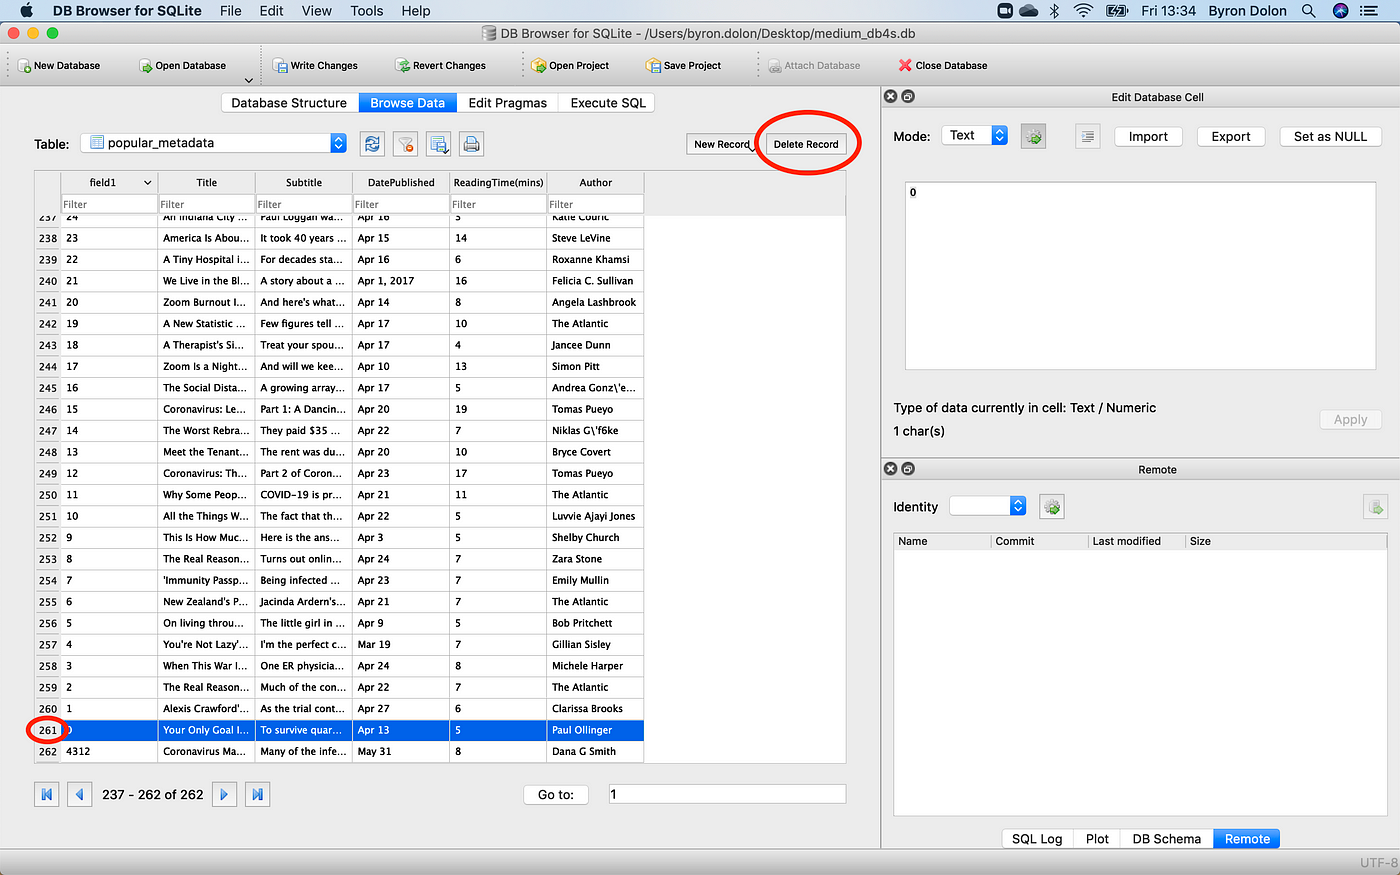
Once you're done with all your changes, click "Write Changes" to save all your modifications and update the table in your database.
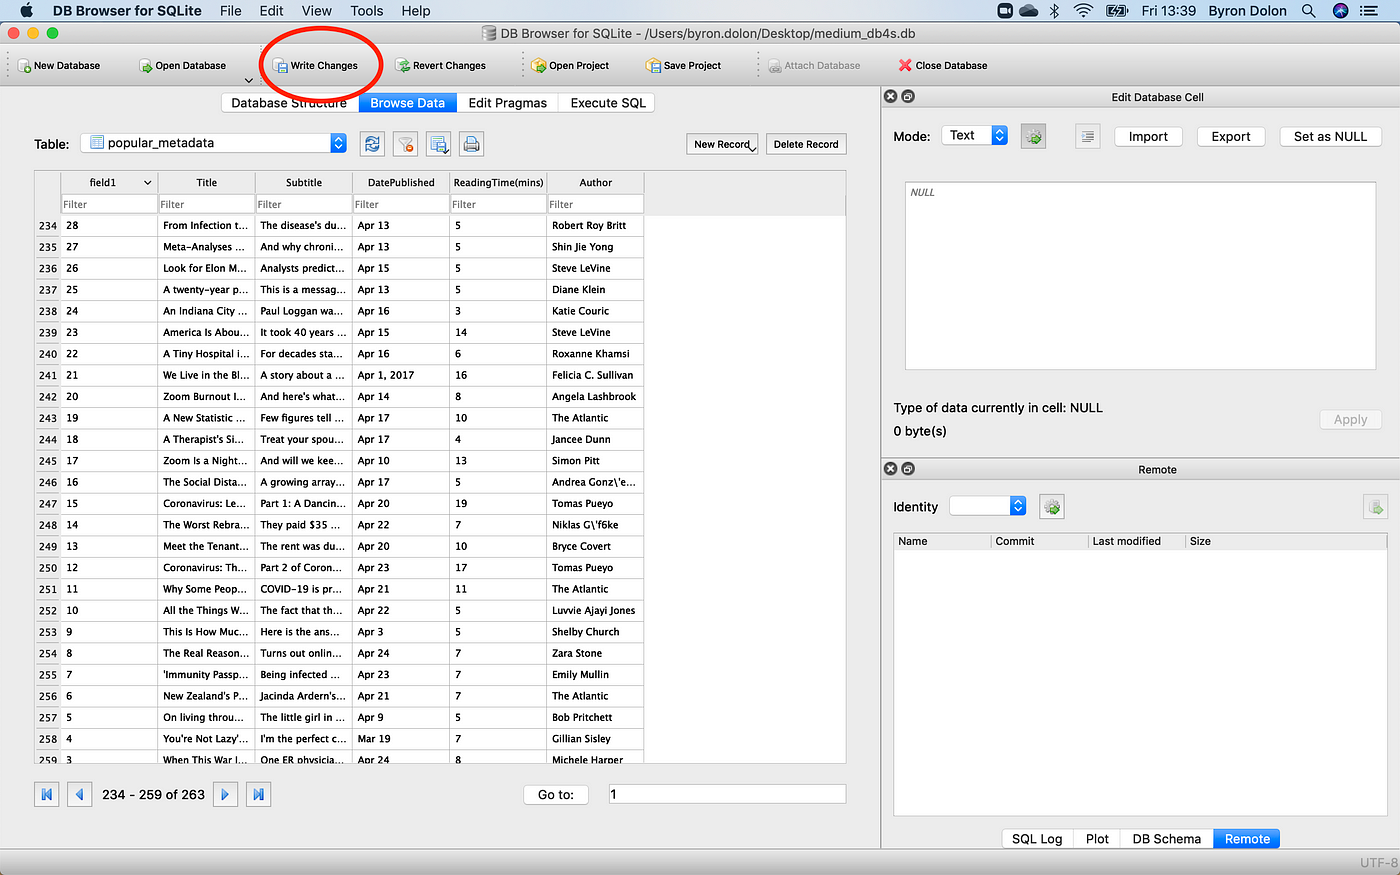
Now on the table, you can see there's a column called "field1". This is because my CSV extract already included an index column. As DB4S automatically creates an index, I don't need this column anymore.
Writing SQLite queries will allow you to make some table schema changes, but there is no one line "DROP COLUMN" feature available. The SQLite docs will give you a workaround for how to drop a column, which involves creating a new table with only the desired columns, copying the data from the old table to the new table, and deleting the old table.
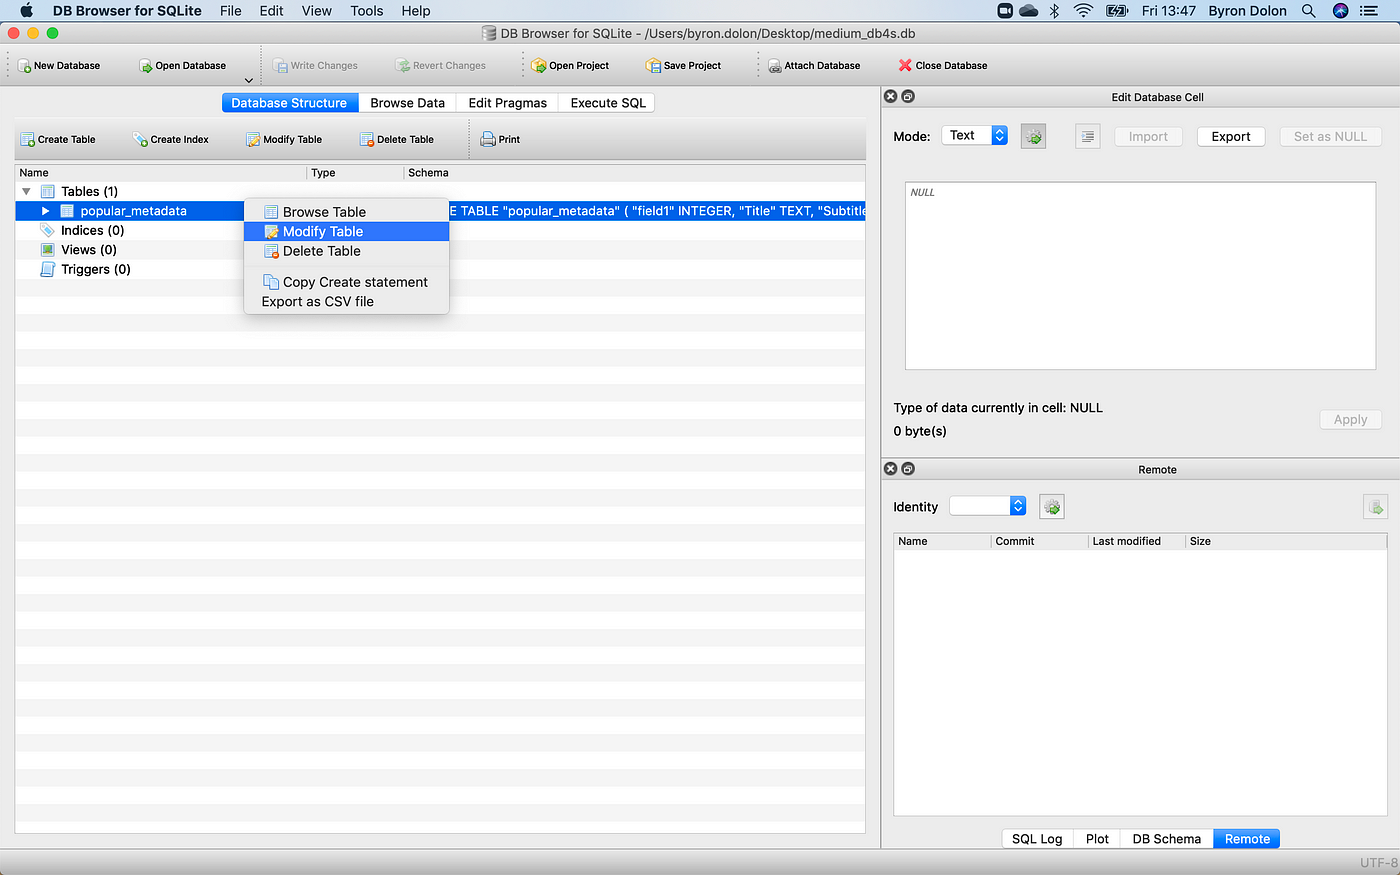
In DB4S, dropping a column is a lot simpler. To delete a column, in the Database Structure tab, right-click on your desired table and click "Modify Table".
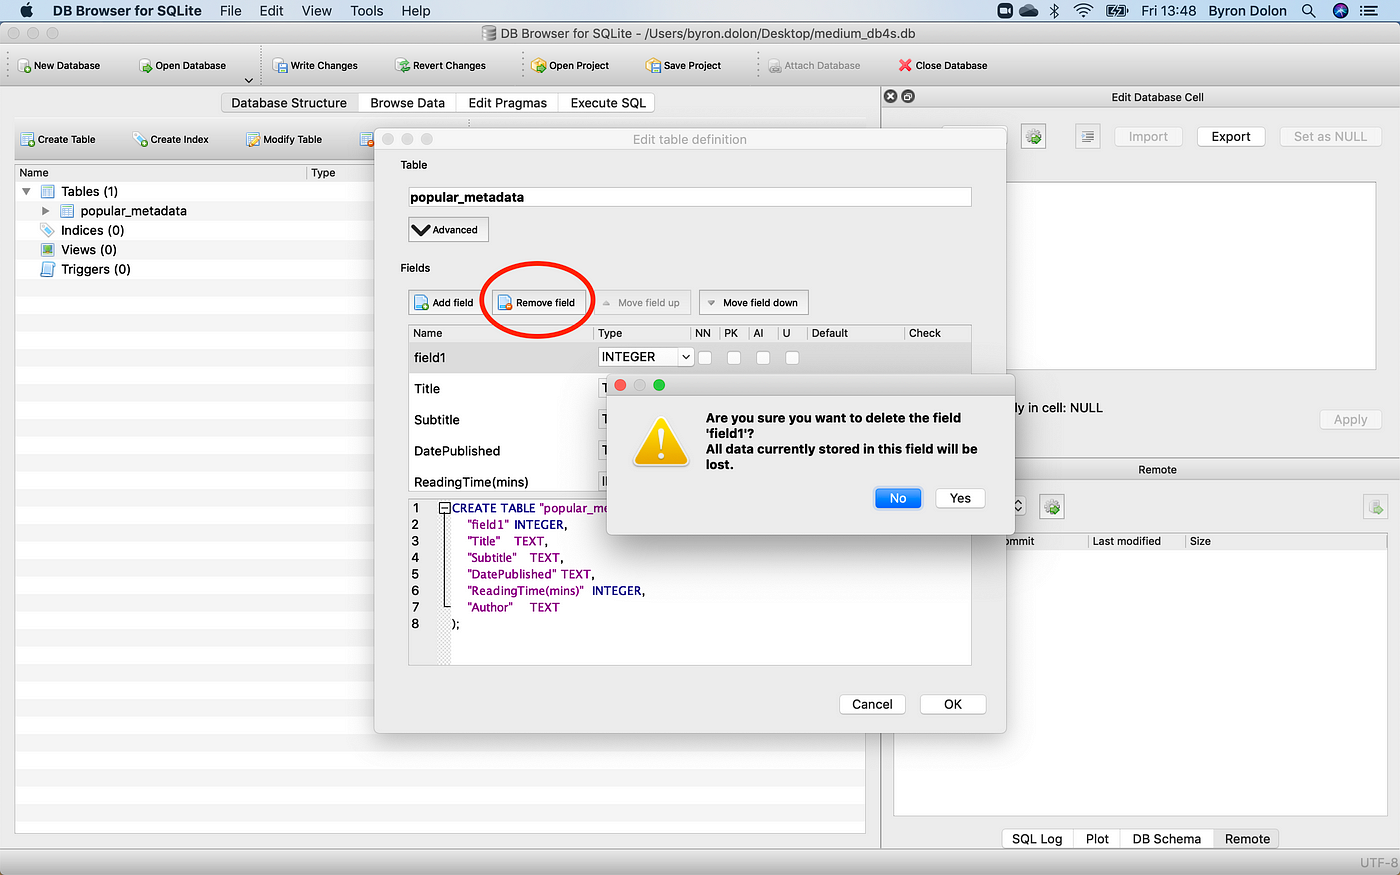
You will see a list of columns currently in your table. Select the column you would like to delete, then click "Remove field" and "Yes".
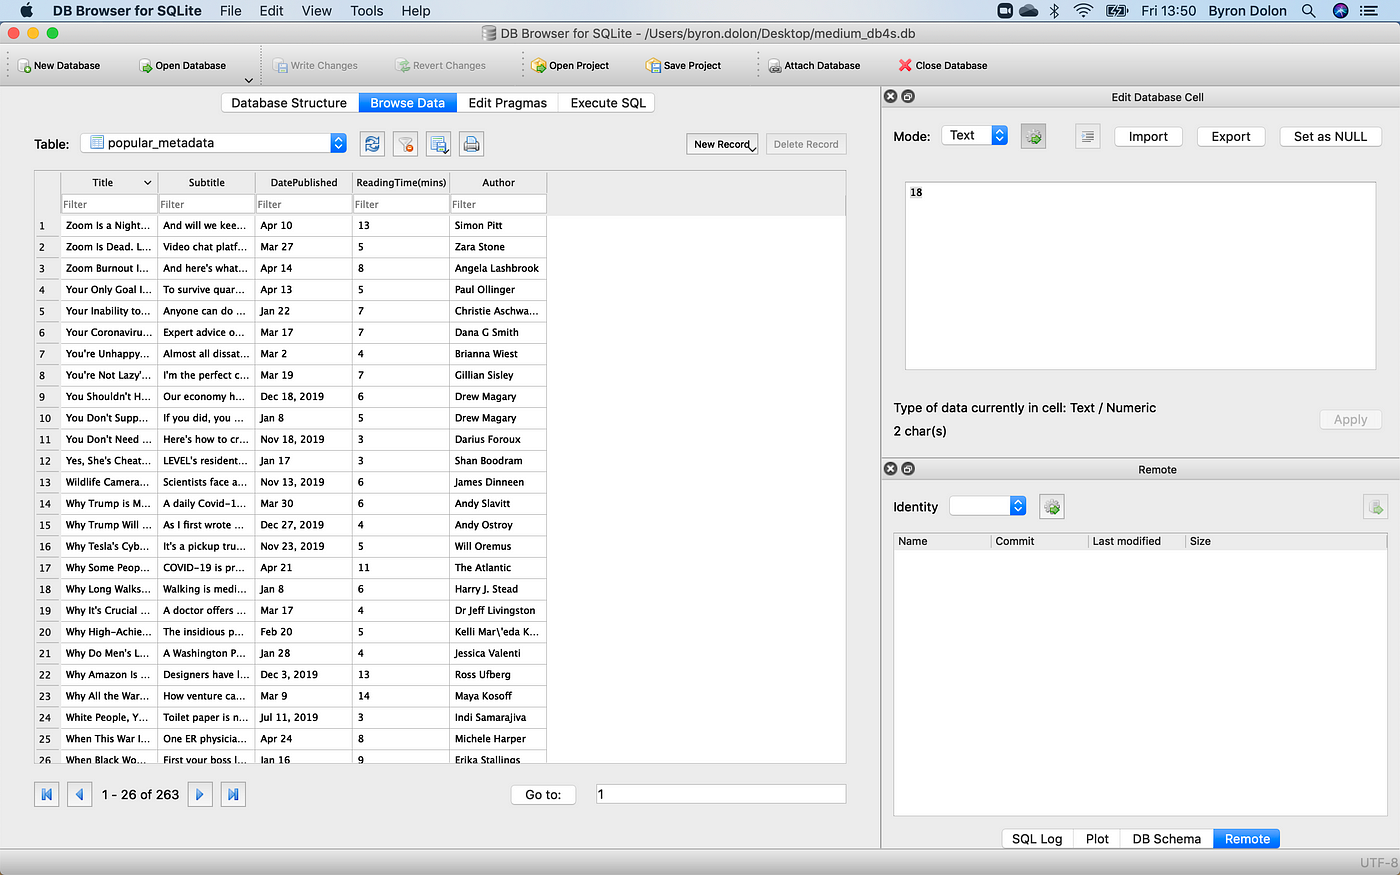
If we go back to "Browse Table", we'll see that "field1" is no longer in the table.
5. Searching and filtering records
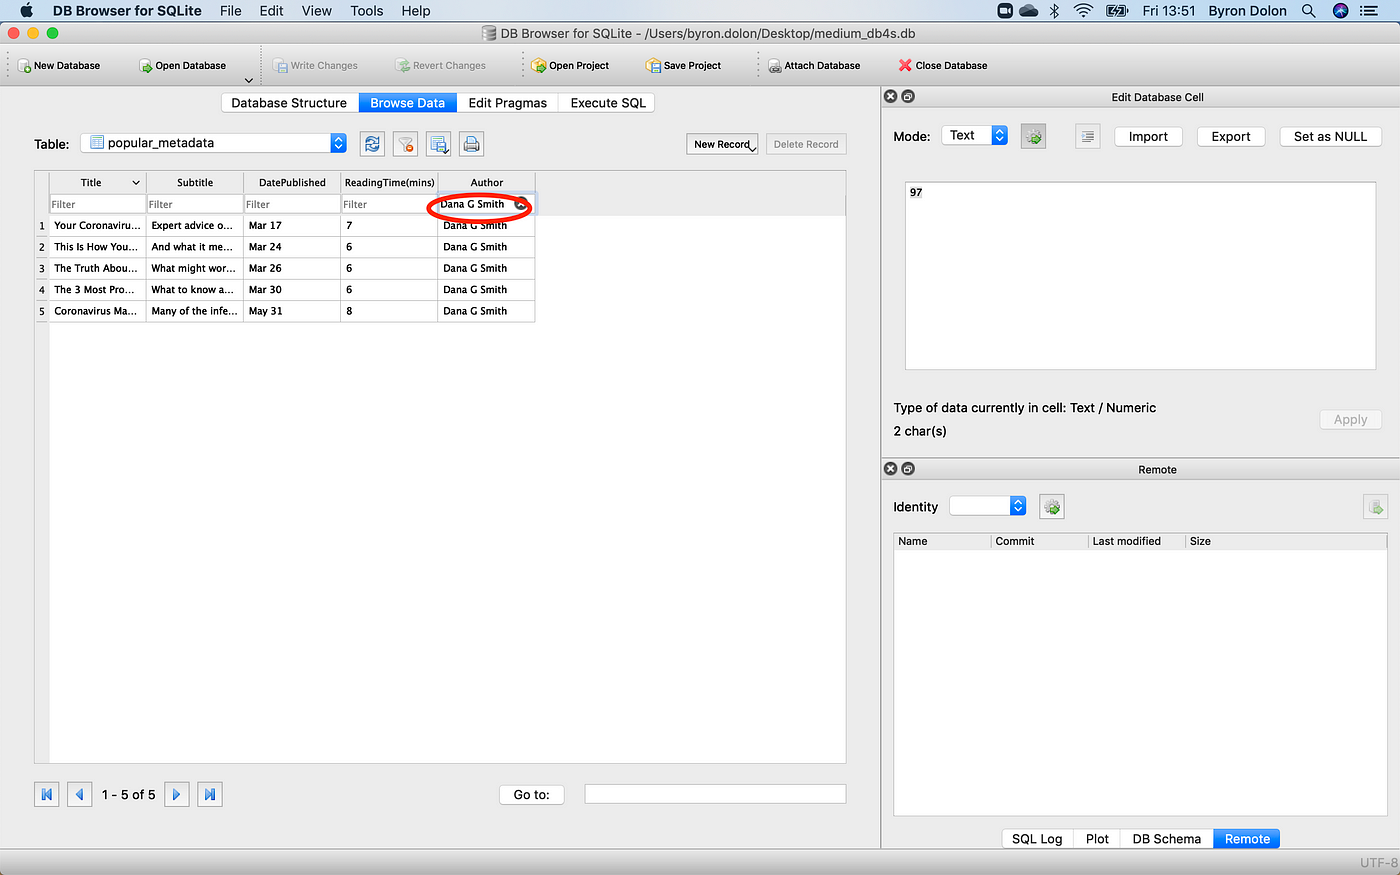
Earlier, we added a record with the author "Dana G Smith". If we wanted to look for all articles published by Dana in the table, we just need to write the name in the "Filter" box under "Author".
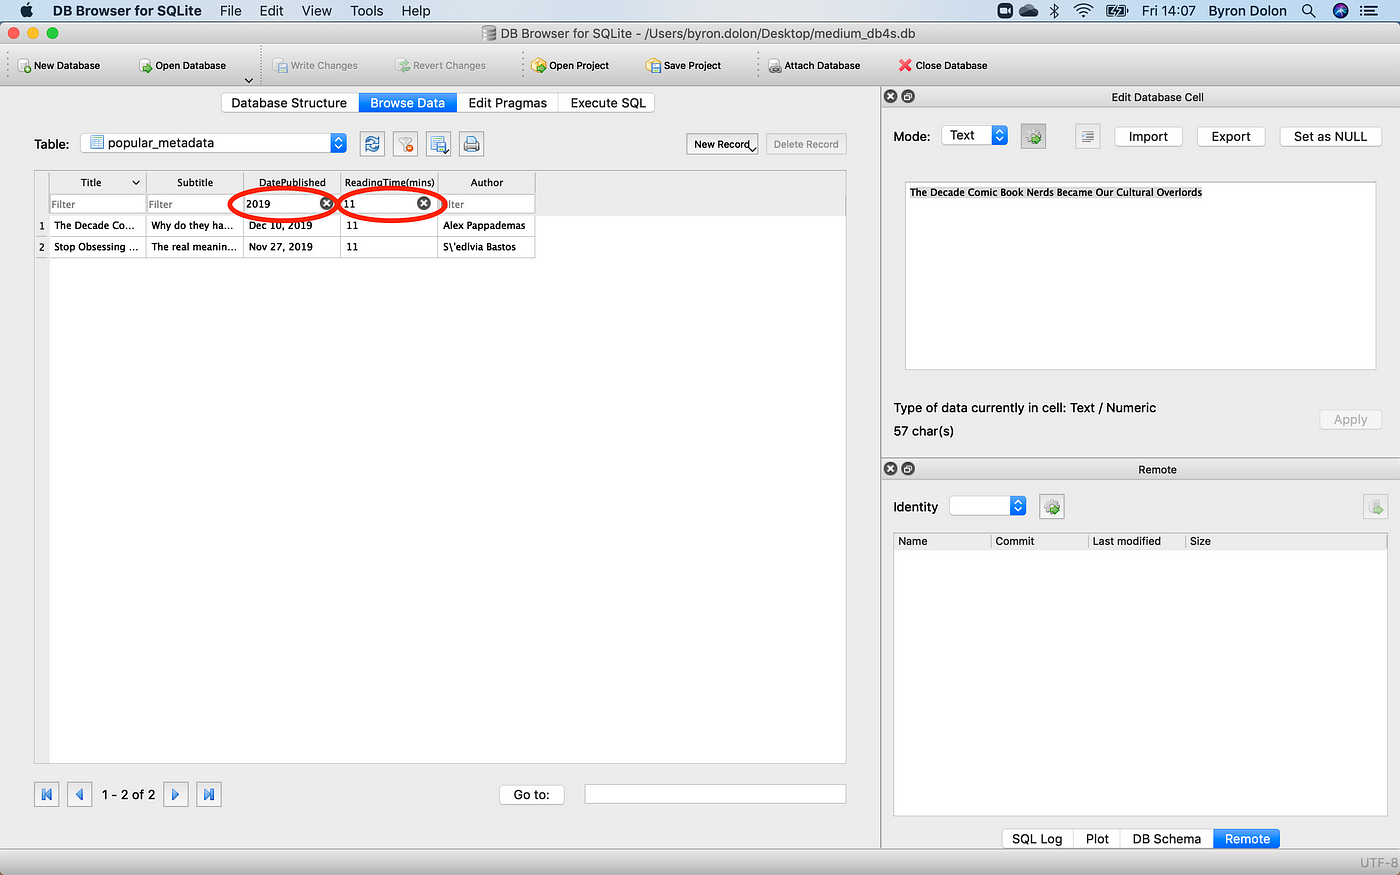
You can also add filter by more than one column at a time. If we wanted to find all articles in 2019 that had an 11 minute read time, you would just need to fill in two of the filter columns. The table would refresh automatically to show you just the results you need.
6. Running SQL queries
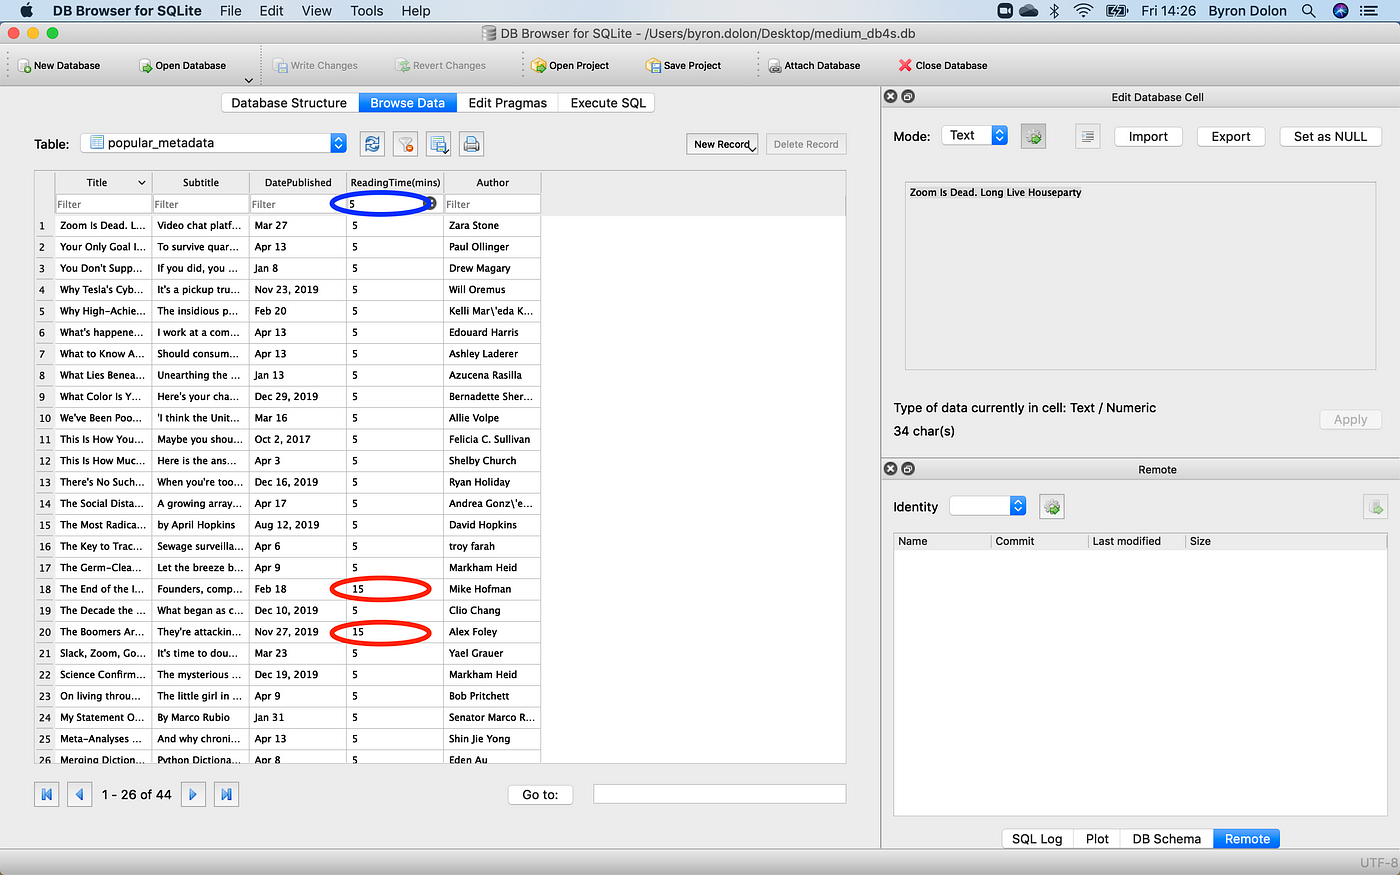
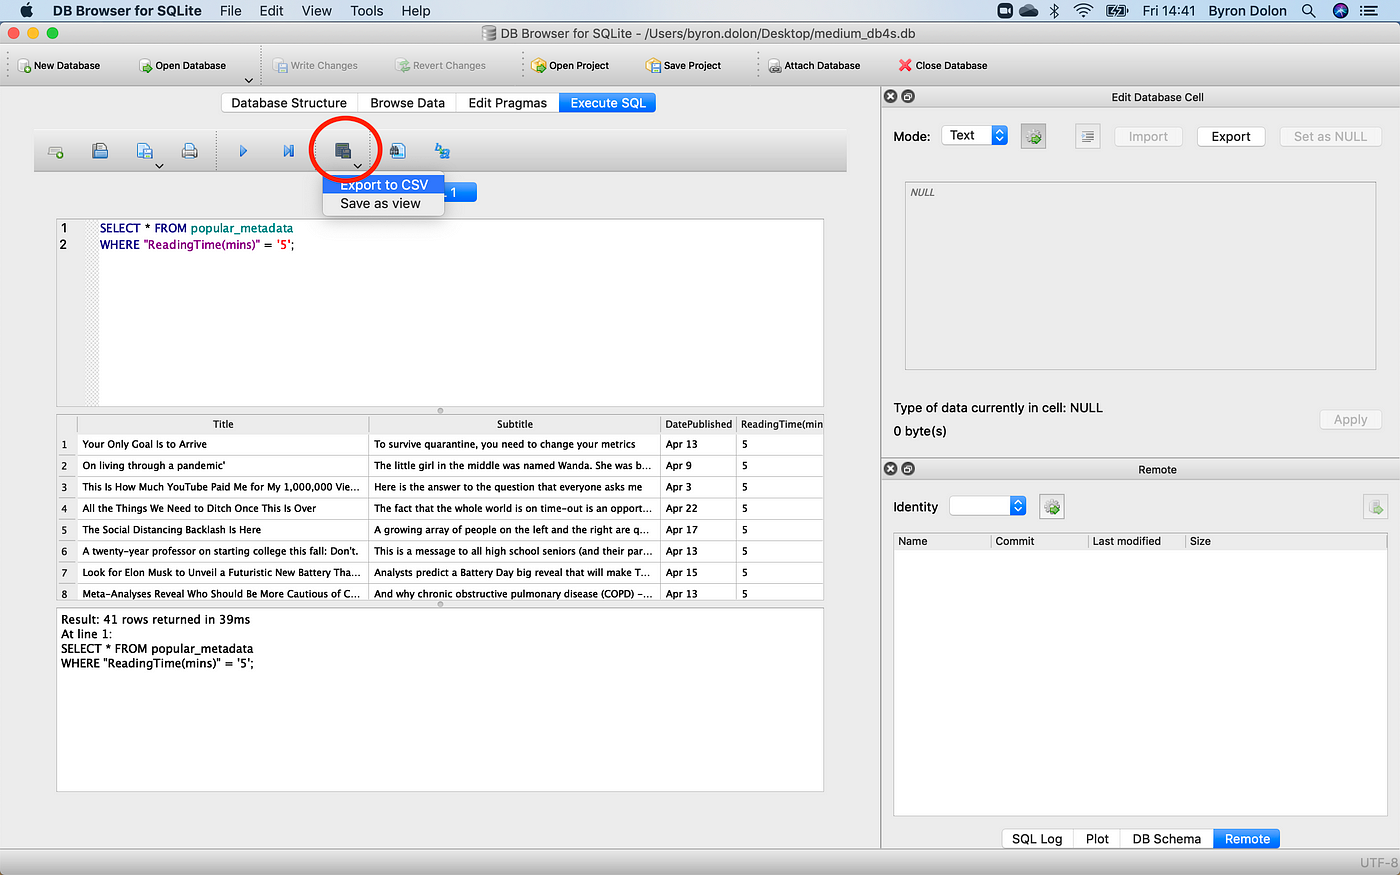
You can run all kinds of SQLite queries via the "Execute SQL" tab. For example, if we wanted to see all articles with a reading time of 5, just typing "5" in the filter column like we did earlier would show some unwanted results. In this case, we'll also get articles that have a reading time of "15".
To fix this, we'll write a basic SQL query that filters results to only have a reading time of 5.
            SELECT * FROM popular_metadata
WHERE "ReadingTime(mins)" = '5'; 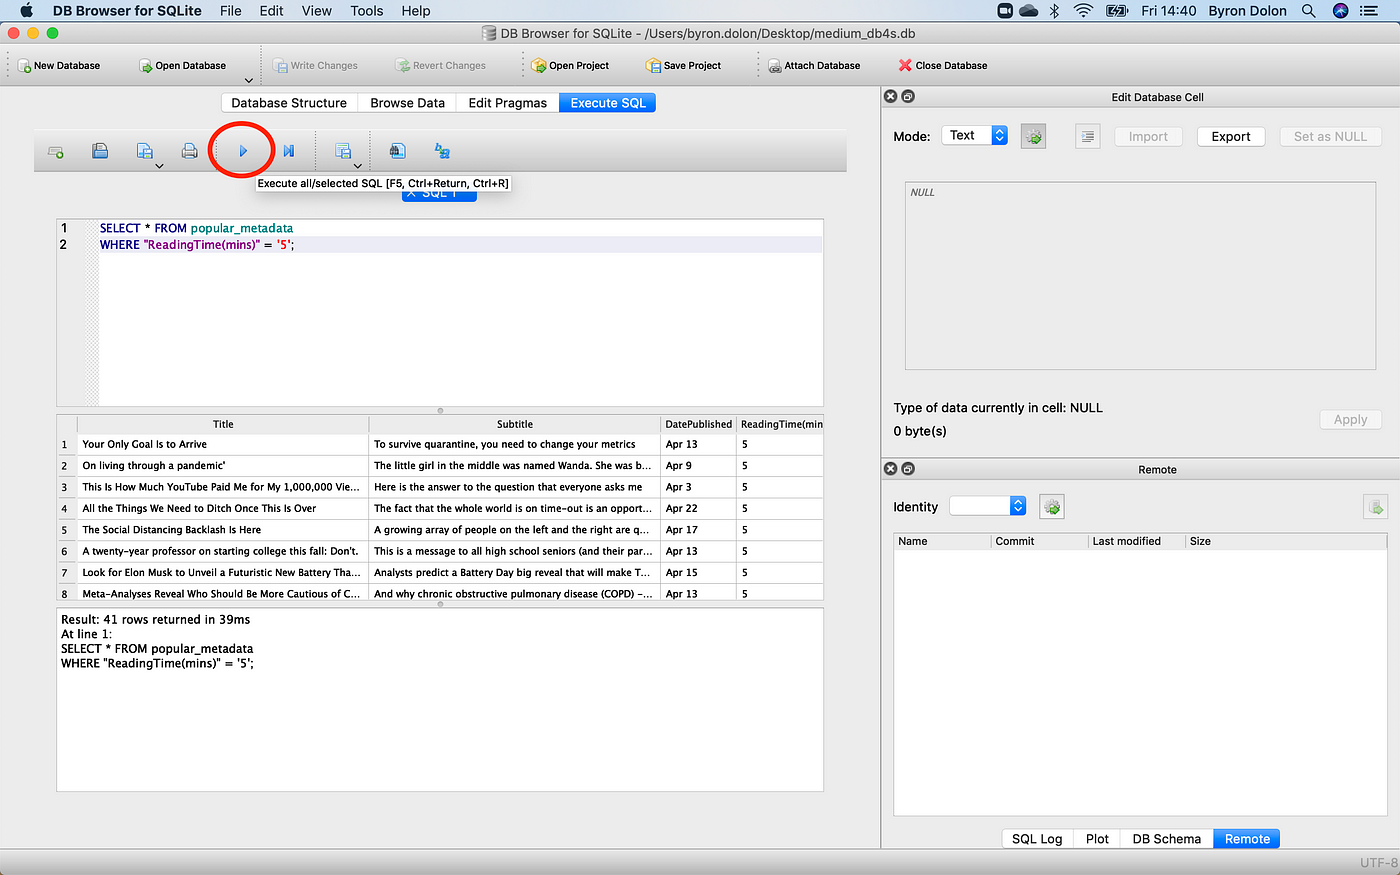
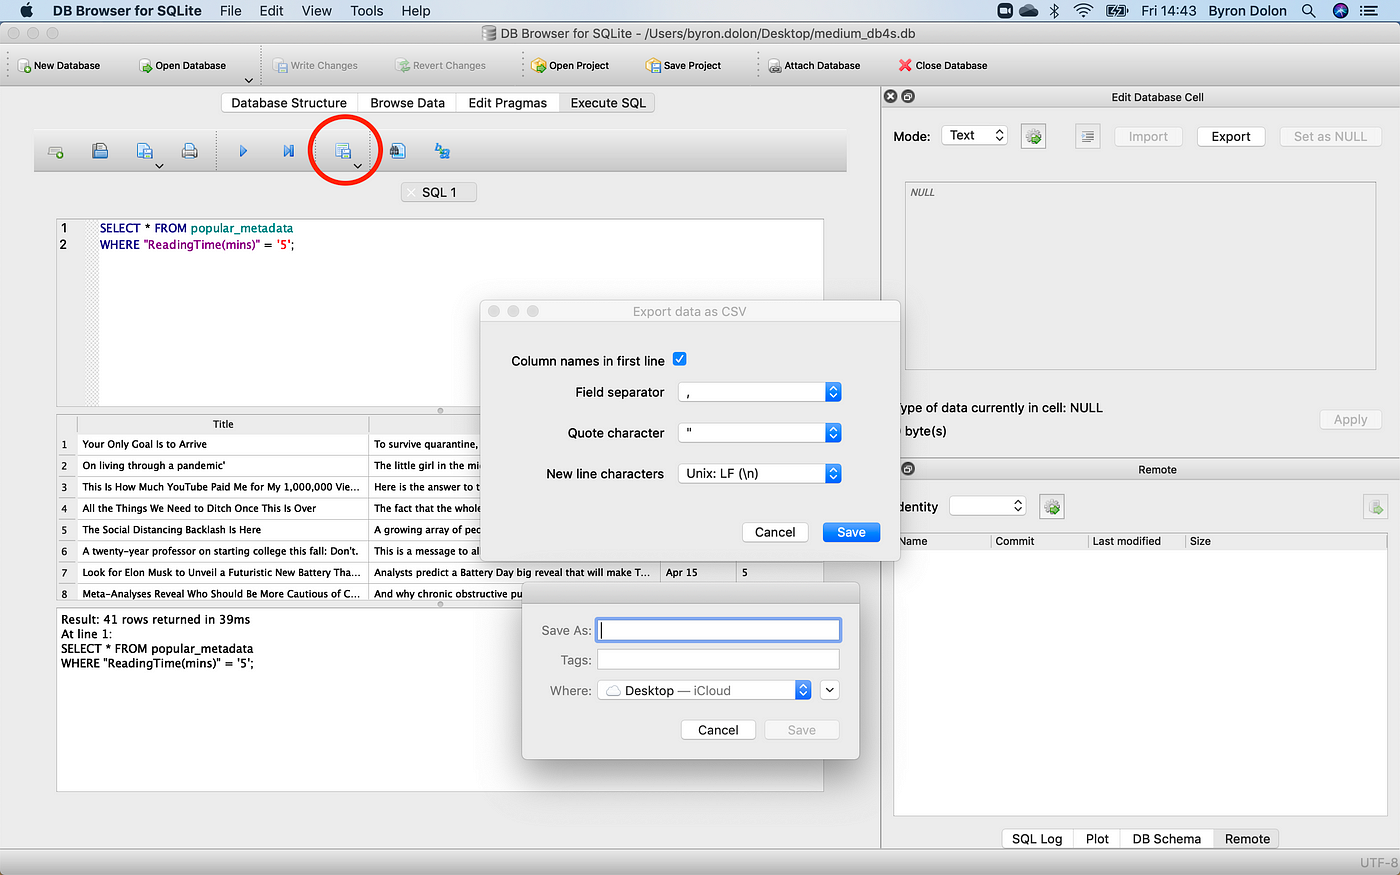
You can easily save this filtered set of results to a CSV. Click the button circled below and select "Export to CSV".
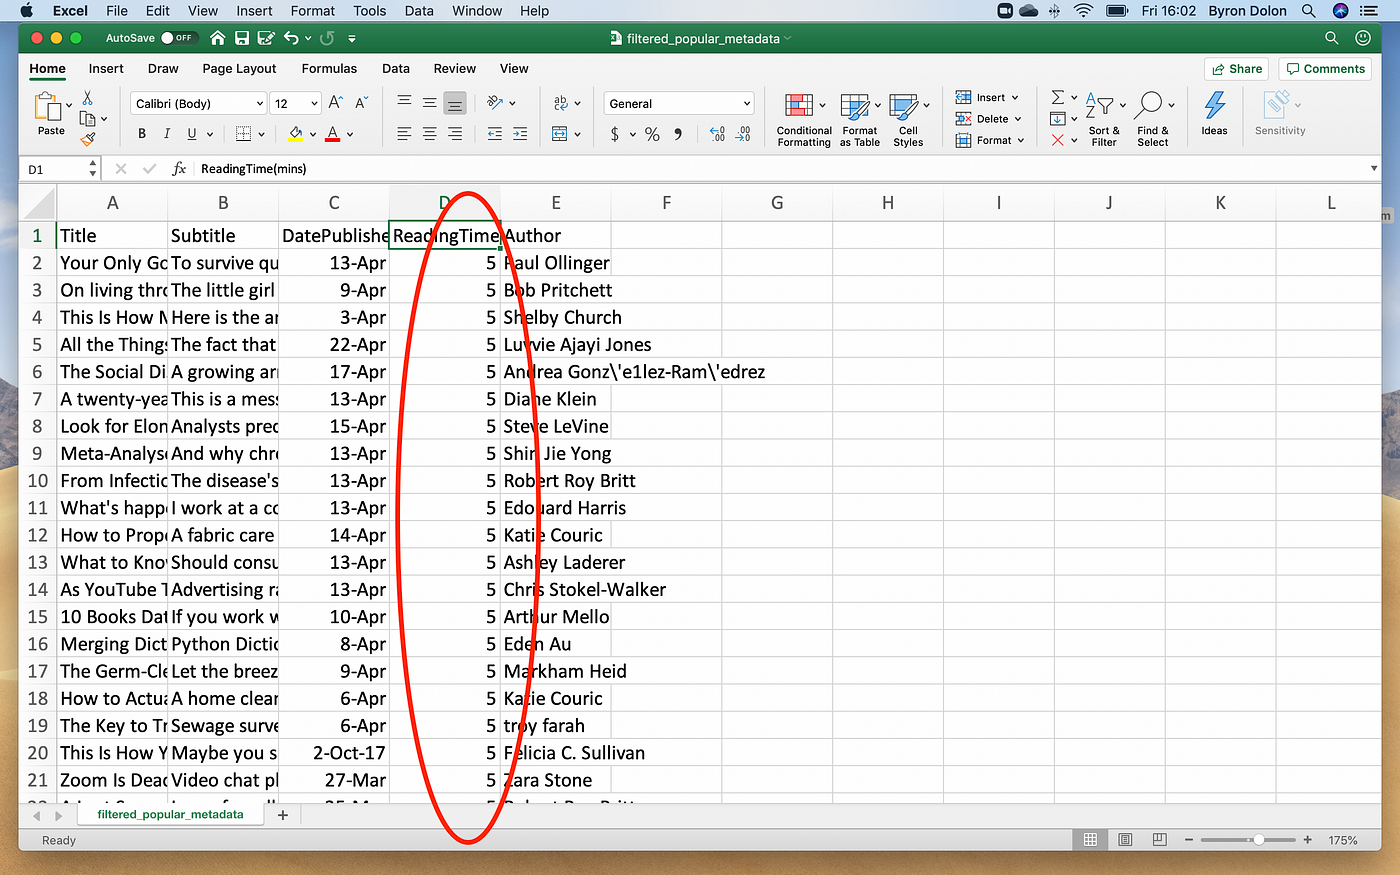
Then, you can configure the CSV output and choose the location to output your file.
Your resulting file will now be filtered to only have articles with a reading time of "5".
7. Visualizing data with graphs or SQL queries
Say we wanted to create a graph that looked at the total reading time of articles per day over-time. To do so without any SQL, we can use the DB4S plot function. Click on "View" and then select "Plot".
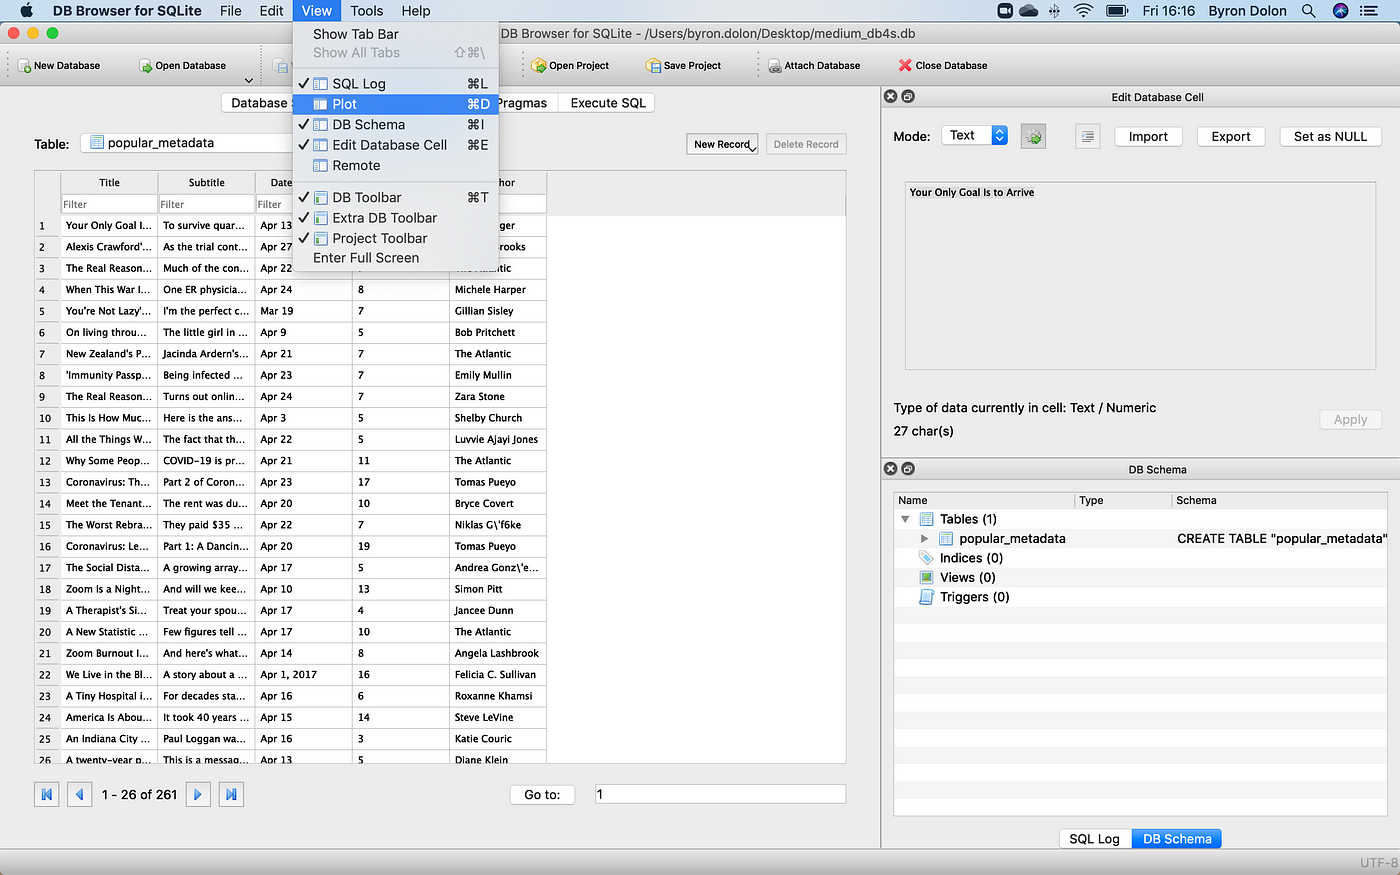
This will open up a new dialog for you to select which columns you want on the X and Y axes of your graph. Below, I selected "Date Published" and "ReadingTime(mins)". DB4S generated a bar graph to show me the reading time in minutes for every day.

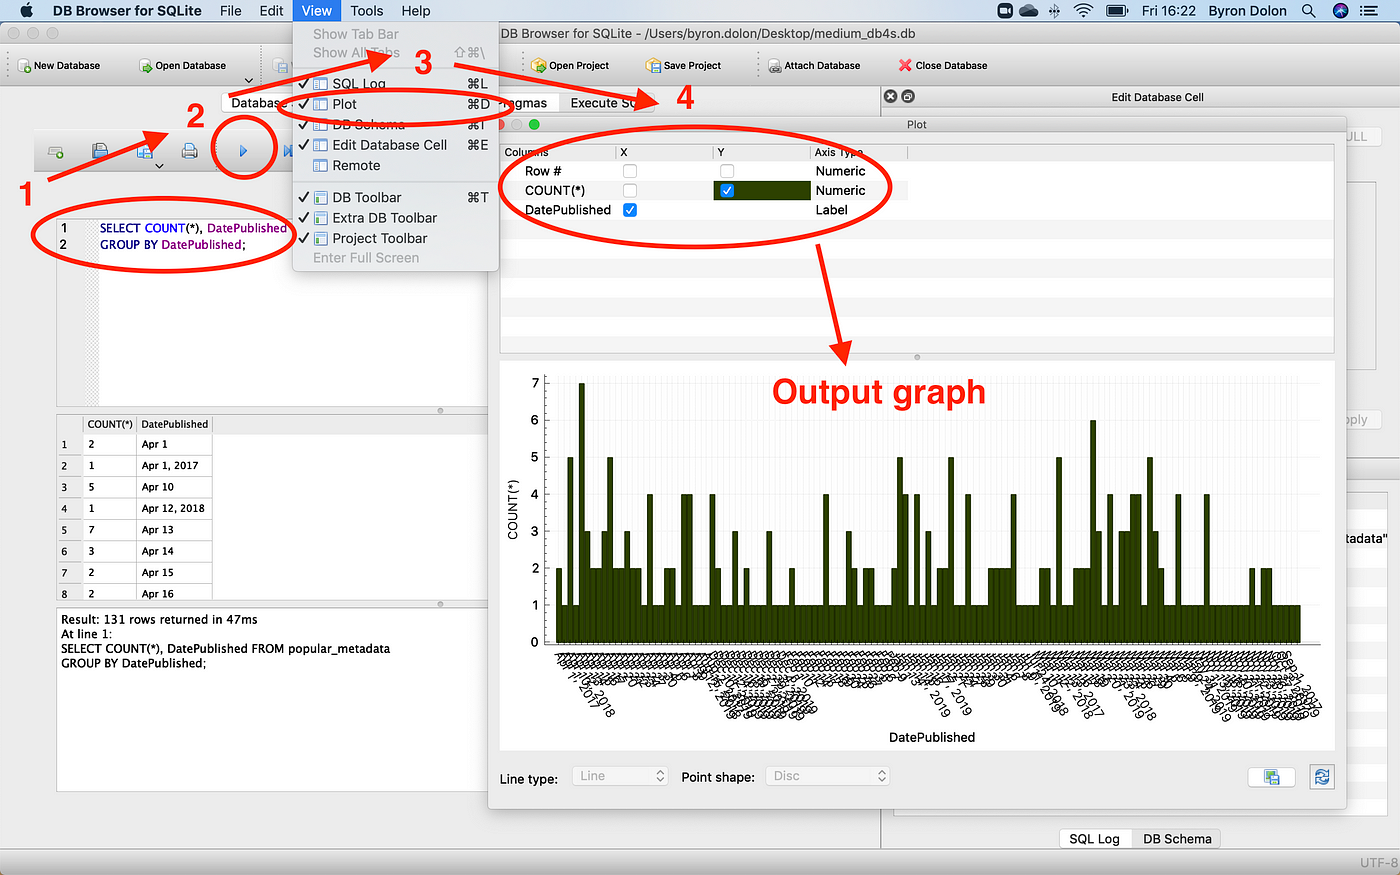
You can also generate graphs from your SQL queries. Say we wanted to count the number of articles published every day. We could write a simple "GROUP BY" query and graph the results.
First, go back to the "Execute SQL" window demonstrated before. Then fill in your SQL query, run it, click "Plot", and select the columns for your axis. You'll see a graph version of the table the SQL query generates.
By now, we've gone through the complete set-up and usage of your own relational database using DB4S! The simple visual interface of the tool allows you to easily get started with creating and managing an SQLite database. After you've gotten comfortable with that, we also looked at how you can actually use the tool to run SQL queries and even visualize data with simple graphs.
This piece was meant to help you get started. For further reading, I'd highly recommend checking out the SQLite docs and the DB4S docs.
If you want to look at how you can write to a database using Pandas, feel free to check out this piece:
How To Create Own Database
Source: https://towardsdatascience.com/an-easy-way-to-get-started-with-databases-on-your-own-computer-46f01709561
Posted by: listergioncy.blogspot.com
0 Response to "How To Create Own Database"
Post a Comment